Showing posts with label cake. Show all posts

Tuxedo Cake

Today is Pi day (3/14. Get it?), and most food bloggers are blogging pie.
As we all well know, I am not most food bloggers. Most food bloggers have decent cameras and also something called "natural lighting" in their fabulous kitchens and endless different kinds of cupcake wrappers. Also, they're not as awkward as I am.

So, in honor of dancing to the beat of my own drum (or accordion, you know, for Irish dancing), I bring you cake.

I don't have a favorite cake, when it comes to eating them. How do you pick a favorite child?
This cake, however, may, hands down, be my favorite cake to MAKE, ever.

This is for a couple of reasons.
Number 1:
It's GORGEOUS.
Number 2:
Making it, and thereby making it GORGEOUS, is an easy thing to do.

I'm not even kidding. If you would like to make a fabulous dessert that looks fabulous and tastes fabulous and is fabulously easy, this is it. Chances are, you have most of the ingredients already, with the exception of one or two. Also, it could feed an army.
Three layers, THREE LAYERS OF CHOCOLATELY GOODNESS! And a really easy whipped cream frosting. Top all of that off with ganache. Doesn't ganache just make everything even better than it already is?
(p.s. you are going to want to use the biggest bowl you own to mix up the cake. Seriously. Huge. And you might cry when you see the length of the directions, but trust me, you can do it.)


Tuxedo Cake

For the cake:
1 cup (2 sticks) unsalted butter
2 cups water
1 cup canola oil
4 cups sugar
1 cup unsweetened cocoa powder
4 cups flour
4 large eggs
1 cup buttermilk
1 TB baking soda
1/2 tsp salt
1 TB vanilla extract

For the frosting:
4 cups chilled heavy whipping cream
1 1/4 cups powdered sugar

For the chocolate glaze:
4 oz high-quality bittersweet chocolate, chopped into small pieces
1/2 cup heavy whipping cream
1/4 cup Lyle's Golden Syrup
2 tsp vanilla

To make the cake:
For a 3-layer cake, place one baking rack one-third from the bottom of the oven and the second two-thirds from the bottom. Preheat oven to 350. Line the bottom of three 9 inch, or two 10 inch (if doing a 2-layer cake) cake pans with parchment paper rounds, grease with butter and dust with flour.

Combine the butter, water, and canola oil in a medium saucepan set over medium heat. In a large bowl, stir together the sugar, cocoa, and flour. Pour the butter mixture into the sugar mixture and whisk until smooth. Whisk in the eggs, one at a time, then whisk in the buttermilk. Whisk in the baking soda, salt, and vanilla all at once. Transfer the batter to the prepared pans. For the 3-layer cake, stagger the cake layers on the oven racks so that no layer is directly over another. Set two layers on one rack and the third on the other. For a 2-layer cake, stagger the layers on the middle rack with one placed more toward the front of the oven and one toward the back. Bake for 35 to 40 minutes, or until a toothpick inserted in the middle of each layer comes out clean. Monitor the layers carefully for doneness; each one may be done at a different time.

Remove the cakes from the oven and cool on racks for about 15 minutes before inverting onto baking racks. Cool the cakes completely, at least 2 hours, before frosting.

To make the frosting: Using a mixer fitted with a whisk attachment, whip the cream in a large bowl on high speed until soft peaks form. Add the powdered sugar and whip until thoroughly combined.

Place 1 cake layer on a platter and spread some of the frosting over the top. Top with the remaining layer or layers, thickly coating the top and sides of each with frosting.
Refrigerated the cake until the whipped cream frosting has stabilized, at least 1 hour (Mine took longer, I would plan on letting it refrigerate for 4 hours minimum, just to be safe.)

To make the glaze: Place the chocolate in a medium bowl. Heat the cream in a small saucepan over medium heat until it is very hot and just beginning to steam. Pour the hot cream over the chocolate and stir until it has melted completely. Stir in the syrup and vanilla. Pour the glaze into a medium pitcher or measuring cup and let cool for 10 minutes. Do not let the glaze sit longer because it will stiffen and become difficult to pour over the cake. Slowly pour the glaze over the cake, ensuring that it covers the top and drizzles down the sides. Cover the of the cake entirely, but make sure some of the cream frosting shows through the drizzles on the sides. (If the glaze doesn't flow easily over the edge of the cake, don't be afraid to add an extra tablespoon or two of the golden syrup.)

Refrigerate the cake until the glaze is set and the whipped cream frosting is firm, at least 1 hour. Slice the cake with a long serrated knife, dipping it in a tall glass of hot water between each slice.
The refrigerated cake will keep for about 2 days.


See? Big bowl. This is the biggest bowl I have and it was still pushing it. I just made sure to mix the ingredients in slowly at first, and then whisked after they were slightly incorporated.


Sorry for the blurriness. The placement of the cakes was kind of weird. And follow the recipe's advice, check them all periodically because they probably won't all be done at the same time.


But it's worth the weirdness of baking 3 layers at once, right? :)


Mmmmm. Frosting.


At this point, I probably could've eaten it like this and been happy.


No, the cake didn't turn yellow, that's just my fantastic lighting. Here it is all frosted and ready to sit in the fridge. Again, mine took about 4 hours until the frosting was set how I wanted it to be.


And Pete was cute taking a nap in the middle of all of this.


This is Lyle's Golden Syrup! I found mine at HEB with the breakfast and Caro syrups.


Here is something that I learned about ganache from a truffle class I took a couple of years ago. When you add warm cream to chopped up chocolate, let it sit for a couple of minutes to soften up the chocolate before stirring. This will be very hard, because you will want to start stirring immediately. Fight the urge! It will blend more easily if you let it sit first :)


You don't need a huge container for the ganache part. Mine fit just fine into my 1 cup glass.


At this point I should tell you that this cake was going to be traveling. I do not recommend this cake for traveling. 
Right before I mixed up the ganache to pour on top, I started having visions of driving this cake from our place to Mike's parents' place and having 3 layers of cake going 3 different directions with every turn. So I called up my friend and asked if she had skewers (it was Sunday or else I would've gone out and bought some) and luckily she did! (this paid off for her, as I took a fourth of the cake to her later that night. See how I trade food for goods?)
So, if you feel the need to take this cake somewhere other than your own table (possible, but again, I don't recommend it) then I would add skewers for stability while traveling.


It was at this point when I almost started singing. I couldn't believe how PERFECTLY the glaze was going down the sides! I mean isn't that beautiful?


Be careful not to pull away from the cake too much though, as you pour, or you'll end up with random spots like this.


Look at that. I know. I KNOW. This is wonderfully moist and rich so it won't take much for one person. 
Also, Mike's aunt Susan was visiting for the weekend, and her birthday is coming up, so it became a birthday cake! Yay!
Happy birthday Susan!!!


Recipe Source: The Pastry Queen, Rebecca Rather (this is a GREAT book, I can't wait to get it for myself someday, rather than just checking it out of the library all of the time :-))

Red Velvet Cheesecake

This post is LONG overdue, but also right on time?

What is it about red velvet and Valentine's Day that just goes together? What is that about? Shouldn't every 2nd and 4th Wednesday, and the occasional Friday, of every month be red velvet occasions?

So, I have been sitting on a red velvet cheesecake recipe for well over a year. And I've been dying to try it, but also I've been dying because it's a good 3 pages long. THREE. It also spans about 3 days of time to make it. I'm not really down with that. Then, THEN!, I found another food blog to follow (I know, another one?) and I saw that she had a recipe for that very cake! And it seemed slightly manageable! And it IS slightly manageable! In fact it's way manageable. I did make it over the course of two days, because I wanted the cheesecake to be really well set up when I assembled everything, but it's entirely up to you. Make it all in one day if you'd like! If you do, you should let the cheesecake sit in the fridge for at least 4 hours.
And people, PEOPLE!, I will not lie. When I make a cake, I typically make it from a box, and throw in some pudding mix to make it more moist. This red velvet cake recipe Is. A. Maze. Ing. AMAZING.
I will make it again for just the cake alone!


Red Velvet Cheesecake

Cheesecake
20 oz full fat cream cheese, at room temperature
2/3 cup white sugar
Zest of half a lemon
1 1/2 tsp fresh lemon juice
1/4 tsp salt
2 large eggs, at room temperature
1/2 cup sour cream, at room temperature
1 tablespoon all purpose flour
Preheat the oven to 325 degrees F and set a kettle of water to boil.
Grease a 9″ springform pan, and line the bottom with a round of parchment paper. Wrap the outside of the pan with heavy duty aluminum foil, and set the pan into a larger pan (for the waterbath.)
In the bowl of a mixer, beat the cream cheese on medium until fluffy. Add the sugar and beat until smooth. Switch to a wooden spoon and beat in the lemon zest, lemon juice, and salt. Add eggs one at a time, making sure they are combined but not overmixing. Add the sour cream. Stir in flour and gently mix just until combined.
Pour the batter into the greased pan. Pour boiling water into the larger pan halfway up the cheesecake. The aluminum foil should protect the cheesecake from seeping water. Bake until the cheesecake is just set in the middle, about 40 minutes. Run a knife around the sides and let the cheesecake cool completely. Press plastic wrap onto the surface of the cheesecake and refrigerate overnight.
Red Velvet
2 1/2 cups cake flour
1 1/2 cups white sugar
1 tsp baking soda
1 tbsp cocoa powder
1 tsp salt
2 eggs, room temperature
1 1/2 cups vegetable oil
1 cup buttermilk, room temperature
1 tsp vanilla extract
1 tsp white distilled vinegar
Red food coloring, as desired
For the red velvet, preheat the oven to 350 degrees F. Grease and flour two 9″ pans.
Sift the flour, sugar, baking soda, cocoa powder, and salt together in a medium bowl. In the bowl of a mixer, beat the eggs, oil, buttermilk, vanilla extract, and vinegar until well combined. Add the dry ingredients and as much food coloring as you like. Beat until well combined, about two minutes.
Divide the batter between the two pans. Bake 25-30 minutes, rotating the pans halfway, or until a toothpick comes out clean. Cool the cakes in the pans for five minutes, then run a knife around the edges. Invert them onto cooling racks and cool completely. 
Cream Cheese Frosting
12 oz cream cheese, at room temperature
6 tbsp butter, at room temperature
1 tsp vanilla extract
1/4 tsp almond extract
3 cups sifted powdered sugar (sift, and then measure)
Beat the cream cheese and butter in an electric mixer until very smooth and lump-free. Beat in the vanilla and almond extracts. Then stir in the powdered sugar a cup at a time until very smooth.
Assembling the cake.
Use a cake leveler or serrated knife to level the tops of the red velvet cakes. Put one of the layers, cut-side up and parchment paper removed, on a serving plate. Spread with a very small amount of frosting, just enough to cover the cake in a thin layer.
Take the cheesecake out of the fridge. Open up the springform pan and peel off the plastic wrap. The cake should be pretty sturdy. Flip over the cheesecake (it should be pretty sturdy) onto the cake, so that the parchment paper and the bottom of the spring form will be on top, and remove those.
If you're cheesecake is wider than the red velvet layer, gently saw off the edges with a serrated knife until it's even.
Spread another very thin layer of frosting on the top of the cheesecake. Flip the remaining layer of red velvet, cut side down, on top. 
Use about a third of the cream cheese frosting to cover the whole cake with a crumb coat. Basically, you want to frost the cake with as little frosting as possible, picking up all the red crumbs and sealing the cake. Refrigerate the cake for half an hour, or until the crumb coat is hardened.
Then frost the cake with the rest of the cream cheese frosting.
Keep the cake in the fridge. It can stand at room temperature about half an hour before serving, if necessary.

Side notes from the crazy woman: I did not like the almond extract in the frosting. After a day or so, it wasn't as prevalent, but when I make this again I plan on leaving it out completely. Other than that, it's all good! I would recommend that you make the frosting while the cake layers are cooling, just for efficiency's sake :)


Have you ever bathed a cheesecake? Don't forget the tear free shampoo! Not really, but this is what it should look like :) It helps it to bake more evenly! And GUESS WHAT. I didn't have a crack on top of my cheesecake! It was really weird baking it without a crust though... You know, until it's sandwiched between two layers of cake... (p.s. I have yet to figure out a way to remove the springform pan from the pan of water without somehow getting hot water on some part of me and completely drenching two hot pads. If you can think of a better way, LET ME KNOW)


Everybody's getting some CHEEEEEESECAAAAAAKE!!! That's what Oprah would say right here.


So it turns out that red velvet cake is controversial. Some people feel that red food coloring will give you cancer or herpes or black lung, and so therefore they feel the red should come from something "natural." Like beets. These are the people that generally breastfeed their kids until they're 15 years old. But then a friend of mine told me that there is supposed to be some sort of chemical reaction between ingredients that makes the cake red? I don't know about y'all, but I dumped a whole (very small) bottle of liquid food coloring in mine to get the red. It was much easier than smashing and straining beats. Or being smart at chemistry.


Do me a favor and line your cake pans with parchment paper. I forgot (I forget 7 times out of 10) and I had a couple moments of sheer terror in which I thought my cake was breaking completely. 


Special thanks to Martha Stewart for teaching me how to keep a cake stand from getting gross with crumbs and frosting. Just put little squares of parchment paper (or any paper) under the bottom layer, and then remove when done decorating!


Behold the glory of the crumb coat. Do not, I repeat, do NOT skip this step. Have you ever done a crumb coat on a cake before? It's GENIUS. It kind of seals everything in, and after being refrigerated, makes the cake smooth enough that you don't have crumbs swimming around in the main layer of frosting.


Right? RIGHT????

Seriously, this is not as daunting as it seems. I know there's a lot of steps, but if you read through the recipe a couple of times, and become familiar with what comes next, then you will be a pro at making red velvet cheesecake!
Enjoy! And happy Valentine's <3


Recipe Source: 17 and Baking

Gingerbread Cake with Cream Sauce

Given the name and the ingredients that go into this particular recipe, you're probably thinking "Sandi, you've just been sitting on this for over a week because this is so 2 holidays ago" And you would probably be right in thinking that. I actually made this on Christmas Eve to take to my sister Angie's house.
See, my sister Holly's birthday is on Christmas, but we usually have her cake on Christmas Eve at Angie's house. Are you confused yet? Wait, it gets better. THIS year, Holly decided she wanted German chocolate cake in the shape of Texas (my mom is so lucky I own a Texas pan) and some of us went "Ew."
At this juncture, I should tell you that I feel about coconut the same way I feel about putting nuts in baked goods. Except sometimes I make exceptions for nuts but I NEVER make exceptions for coconut. German chocolate combines both of those things so I immediately said "Mooooom! I don't like it! Can I make something else???"
And she was more than happy for me to do that.
And Holly didn't care, so I went to this recipe. I've been dying to make it for awhile.
I would like to argue that this cake is so freaking good that you could make it year round and be pleased. Which is my plan, in all honesty. Even though it's meant for Christmas. Oh well!

Also, don't forget to add some whipped cream to the top when serving! (homemade please, you know how I feel about the kind that comes in a tub...)


Gingerbread Cake with Cream Sauce
1 cup sugar
1/2 cup butter, softened
2 cups flour
2 tsp ground ginger
2 tsp ground cinnamon
1 tsp ground allspice
1/2 tsp salt
Mix until crumbly. Reserve 1/2 cup of the above mixture for the streusel topping. To this, add 1/2 cup chopped pecans, if desired.
To the remainder, mix in
1 tsp baking soda
1 cup buttermilk
1/2 cup molasses
2 eggs
Pour batter into a well-greased 13×9 baking pan. sprinkle with the reserved streusel topping. Bake at 350 for 28-30 minutes, or until toothpick comes out clean. Watch carefully so you don’t overbake. Let cool slightly, and serve warm with Cream Sauce.
Cream Sauce
1 cup sugar
1 cup heavy cream
1/2 cup butter
dash ginger
Combine and bring to a gentle boil over medium heat. Stir 4 minutes. Serve and warm sauce over gingerbread. Refrigerate any remaining sauce.

See?? SIMPLE! And do you need to even know that I did NOT add pecans?


Can I tell you something that I love? (if you already know how to make your own buttermilk, keep reading on, if not, keep reading HERE -->) I haven't bought buttermilk since moving from Tyler back to Austin and I will tell you why. To make one cup of sour milk (the equivalent/PERFECT substitute to buttermilk) take one tablespoon (TABLEspoon!) of vinegar and add enough regular milk to make one cup. Let it sit for a couple of minutes and you're good to go! 
Thanks mom! Best little trick I've learned since figuring out that chicken bouillon cubes do the same thing as chicken broth and cost a whole heck of a lot less.

MOVING ON!


Here is the cake, naked. AVERT YOUR EYES! 
You might think you have too much crumble topping (or that your crumble seems like there isn't enough butter mixed in, really it's perfect, trust me) but you have the right amount. I so declare it to be true!


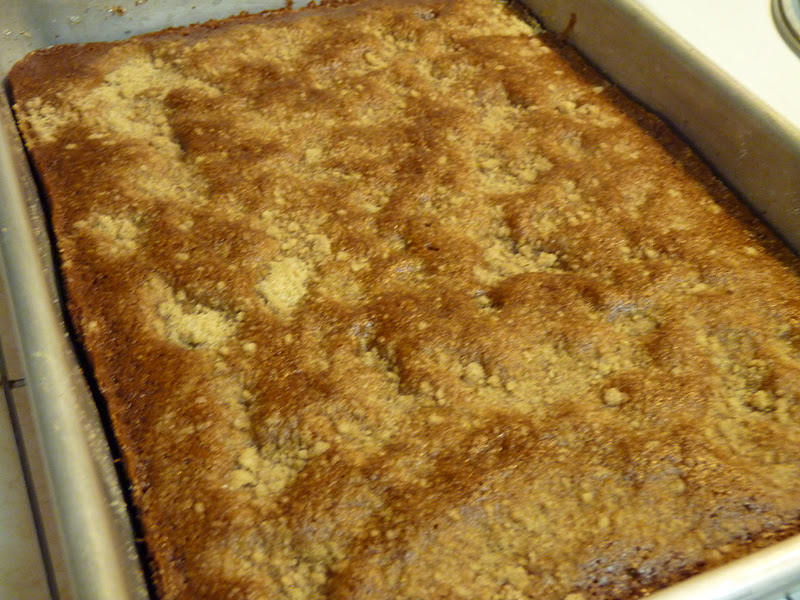
Here's what it looks like just baked. It reminded me of pretzel actually...? It does NOT taste like pretzel!


Look at that. I know, right? I wish I had taken a picture of the cream sauce. I was hesitant of it at first. It kind of looked like...some sort of egg mixture? But just go with it okay? It. Is. De. Li. Cious.


Recipe source: The Sister's Cafe

Cinnamon Roll Pumpkin Sheet Cake

I can't even begin to give an excuse for putting off posting about this for about a week. Sometimes, y'all, I procrastinate. There. I said it. Sometimes, it's the bane of my existence. Luckily for you people, this post was deeeefinitely worth waiting for, and you didn't even know it! This recipe was a case of having left over canned pumpkin. I had enough to do a half recipe, but not the whole, so FYI, if you want to half it, it works great in a 9x9 pan.
Also, if you like pumpkin but not pumpkin pie, I would seriously consider using this as a substitute on Thanksgiving.
I will preface this recipe by saying that I left out a vital ingredient... By some trick of fate, it still turned out to be delicious, despite the majorness of this ingredient. I'm anxious to make it again WITH the forgotten ingredient, to see if I like it better with or without. Do you want to know what I left out? Well first maybe you should read the recipe:


Cinnamon Roll Pumpkin Vanilla Sheet Cake

1 box yellow cake mix
4 eggs
1/2 cup canola or vegetable oil
1/2 cup milk or buttermilk
3.4 ounce box Vanilla Instant Pudding Mix
1/2 cup sour cream
15 ounce can pumpkin
1 stick (8 tablespoons) unsalted butter
3/4 cup packed light brown sugar
1/2 teaspoon ground cinnamon
3/4 cups powdered sugar
1/4-1/2 cup heavy cream (start w 1/4 cup and add a little more cream if needed)

1. Preheat oven to 350 degrees F. and spray a jelly roll pan with non stick cooking spray.

2. Place cake mix, eggs, oil, milk, pudding, sour cream and pumpkin into a stand or electric mixer, beating until well combined, about 1 1/2 minutes. Pour into prepared pan, spreading evenly.

3. Place butter into a microwave safe bowl and melt, about 30-40 seconds. Add brown sugar and cinnamon to bowl, mixing until combined. Drizzle mixture evenly over cake then take a knife and run it through to swirl.

4. Bake cake for 30-35 minutes, until cooked through and remove. Place powdered sugar and cream into a large bowl and mix until creamy and smooth. Drizzle over warm cake then let cool for 20 minutes before cutting into squares. Refrigerate if not serving same day.  Enjoy with milk!
Makes 16 to 20 squares


Alright, so here's what I left out: the eggs. Do you want to know what's so hilarious about me leaving out the eggs? I made this on a Sunday and as I was taking inventory of my ingredients (I didn't want to start and then not have everything because I couldn't run to the store. It was the Sabbath people!) I distinctly remember thinking "Oh good, if I do half then I'll still have 2 eggs left for breakfast tomorrow." Twice I thought this. I guess I was just so overcome by how awesome this was going to be that I totally left them out. You know what? It was delicious. SO, if you don't have eggs, or if you're in the middle of baking this and you forgot them, never fear. It still works. 6 out of 6 Roughtons agree.

I am, however, definitely making this again. WITH eggs. (How funny will it be if I end up liking it better without?)


Post-swirl, pre-bake.
At about this point I was thinking "This is really thick cake batter..." I suppose that happens when you leave out the eggs...


This is what it should look like out of the oven! 


At this moment, I would like to invite all of you who make this, to take the time to lick the white drizzle bowl clean. How come I never thought of mixing powdered sugar and heavy cream?!!?!? AMAZING!!!


Recipe Source: Picky Palate

Pumpkin Roll

How about we find out what I did with the rest of that can of pumpkin? Shall we? By the way, I have literally been baking up a storm (there is a cloud of confectioner's sugar rotating above my apartment, with frosting rain coming down) all weekend I have a bunch to share with you! A BUNCH I say! But one thing at a time?

So, I have had this recipe in one of my make shift recipe notebooks for awhile. Last Sunday, Mike declared that it was the kind of afternoon where I bake something and I declared the perfection of that because I needed to use the rest of the pumpkin from the snickerdoodles. And this is what he picked. A pumpkin roll. I've always wanted to make one. I've made a couple of cake rolls before, but this one.... well it tasted good. We'll get to my problem later on.


Pumpkin Roll

1 cup cake flour, sifted (do NOT use regular flour!)
2 tsp pumpkin pie spice
1/2 tsp baking soda
1/2 tsp salt
5 large eggs
1 cup sugar
1 cup canned pumpkin puree (I had the PERFECT amount to do a batch of the snickerdoodles and this!)
3 cups creamed cheese frosting
Confectioner's sugar and spiced nuts for garnish (optional-do you really think I put nuts on this? of course not)

For the cake: Adjust oven rack to middle position and heat to 350. Grease 18 by 13 inch rimmed baking sheet and line with greased parchment paper. Whisk flour, spice, baking soda, and salt in medium bowl, set aside. With electric mixer on medium high speed, beat eggs and sugar until pale yellow and thick, 6 to 10 minutes (seriously, beat it that long. Don't think that just mixing until combine is enough. It's going to change color and thickness as you continue to mix it, I promise) Add pumpkin and mix on low until incorporated. Fold in flour mixture until combined. Spread batter evenly in prepared pan. Bake until cake is firm and springs back when touched, about 15 minutes. Before cooling, run knife around edge of cake to loosen and turn out onto clean sheet of parchment paper that has been dusted with confectioner's sugar. Gently peel off parchment attached to cake and discard. Roll cake and fresh parchment into log and cool completely, about 1 hour.

To assemble: Gently unroll cake and spread with frosting, leaving 1 inch border at edges (you could probably go within a half of an inch...) Re-roll cake snugly, leaving parchment behind. Wrap cake firmly in plastic wrap and chill completely, at least 1 hour or up to 2 days. Remove plastic, dust with confectioners' sugar and garnish with spiced nuts.

Here's the cream cheese frosting recipe I used (but you can use your own, just have about 3 cups worth):

Fluffy Cream Cheese Frosting - makes 1 1/2 cups, enough to frost 12 cupcakes

4 TB unsalted butter, softened but not super soft and warm
1 cup confectioners' sugar
4 ounces cream cheese, softened, cut into 4 pieces (soften at room temp about 15 minutes, do not soften in the microwave or the texture of the frosting will be too runny)
3/4 tsp vanilla extract

With electric mixer on medium high speed, beat butter and confectioners' sugar until light and fluffy, about 2 minutes. Add cream cheese one piece at a time, beating thoroughly after each addition. Add vanilla and mix until no lumps remain.


Here's the cake after baking. Kind of spongy looking.


And yes, it should definitely look like it has paper rolled into it when you roll paper into it...


Finished product!!! Pretty right? Wait...


See? As I said before, I've done cake rolls but I honestly don't know what I did wrong this time around. I rolled it into parchment paper after I took it out of the oven, I let it cool completely before unrolling it, and then when I did unroll it, it snapped in 2 places! I was so mad. It still tasted yummy though.

But seriously, if anyone has experience with this, or can give me any ideas of what I can do differently so this doesn't happen again, PLEASE impart your wisdom! I'm at a loss here... But still! Yummy! I mean hello, it's pumpkin and cream cheese. Can you really go wrong?

Recipe Source: Cook's Country

Lemon-Lime Poppy Seed Cake

Sometimes, you want to make a really good cake. Sometimes, you want to make a really good cake and not exert much effort in doing so. If you fall in the second category ever, then this post is for YOU! Get excited :) I really wanted to bake a cake yesterday, but it had been a hectic day and I didn't have the time or patience to make a full-blown homemade cake, so I consulted with my Taste of Home cake mix book (I loooooove Taste of Home. Did you know you can get all of their recipes FREE??). I didn't take a bunch of pictures this time around because it's pretty easy and I didn't feel like I needed to reassure you on any of the steps by showing you what mine was looking like.


Lemon and poppy seeds are a match made in heaven. For further proof, check this
post out.


Lemon-lime poppy seed cake
1 package (18 1/4 oz) yellow cake mix
1 package (3.4 oz) instant vanilla pudding
1/4 cup poppy seeds
4 eggs
1/2 cup water
1/2 cup canola oil
1/4 cup lemon juice
1/4 cup lime juice
GLAZE: 1 3/4 cups confectioners' sugar
2 TB lemon juice
2 TB lime juice


1. In a large bowl, combine the first eight ingredients. Beat on low speed for 30 seconds; beat on medium for 2 minutes. Pour into a greased and floured 10 inch fluted tube pan.
2. Bake at 350 for 40-45 minutes or until a toothpick inserted near the center comes out clean. Cool for 10 minutes before removing from pan to a wire rack to cool completely.
3. In a small bowl, combine glaze ingredients until smooth, drizzle over cake.


Enjoy :)

For the Dogs

Yesterday my little baby baby puppy puppy silly little goosey goosey Pete (yes, he gets called that on a regular basis) turned FOUR! I can't believe I've had Pete for almost 2 years (our familyversary is at the end of May) and I can't believe he's already four. I don't have a real child yet, but Pete might as well be. I love this dog more than just about anything. He's sillier than all get-out and makes me laugh all of the time. See the last picture of this post for proof.

Last year was his first birthday with us and I made a cake for him that he really seemed to like, so I did it again this year!
This cake is completely human friendly, if you're the kind of human who digs bland, carrot filled things...


Flour, egg, peanut butter, and carrots! Delicious right????


This is what it's going to look like before you bake it. It doesn't really spread so you just have to mush it around the best you can.


This is what it looks like AFTER it's baked. Pretty much the same, just browner.


What a handsome birthday boy! (he enjoyed eating the hat)


Happy Birthday Petey Pie!


Pete Roughton's Birthday Cake Recipe

1 cup flour
1 tsp baking soda
1/4 cup peanut butter
1/4 cup vegetable oil
1 cup shredded carrots
1 tsp vanilla
1/3 cup honey
1 egg

Mix flour and baking soda. Add remaining ingredients. Pour into greased 8'' round cake pan and bake at 350 for 30 minutes. Leave in pan for a couple of minutes then remove to wire rack to cool completely.
*You can also puree cottage cheese in a blender for icing or decorate with more peanut butter or carrots.

BONE appetite! Haha! Get it? Get it.....

Better Than Sex

What? That's what the name of this dessert is. Better Than Sex Cake! While the title isn't entirely true, it's still pretty dang amazing. Part of what makes it so great is that it's very easy to do! (I'm trying to think of some sort of pun to go along with the name of the cake right here, but I just can't think of anything right now...)

Here's the recipe for it:

Ingredients
German chocolate cake mix (plus the ingredients called for on box)
1 can (14 oz) sweetened condensed milk
1 jar (12 oz) caramel, butterscotch, or fudge topping
8 oz cool whip, thawed (3 cups)
1 bag (8 oz) toffe chips or bits

Directions
Heat oven to 350. Make and bake cake as directed on package for 9x13 pan. Cool 15 minutes. Poke top of warm cake every 1/2 inch with handle of wooden spoon. Drizzle milk evenly over top of cake; let stand until milk has been absorbed into cake. Drizzle with caramel topping. Run knife around sides of pan to loosen cake. Cover (with foil) and refrigerate about 2 hours or until chilled. Spread whipped topping over top of cake. Sprinkle with toffee chips. Store covered in refrigerator.


Don't freak out when your cake looks like this after poking holes in it. It felt wrong to me too, but it's okay because this is how it's supposed to look :)


This is what it will look like after you pour the can of milk over it and let it absorb. It really takes only about a minute for it to do that.


And here it is with the caramel! You're probably bored with all of these holey cake pictures. I posted them so that you know that yours looks okay when you make it later tonight after that chocolate craving hits.

YUM!!
I have a couple of thoughts on this cake. First of all, I. HATE. COOL. WHIP. It is just whipped oil. I can't stand it, it's disgusting. I HIGHLY recommend you just make your own whipped cream! If you've never done it before, you CAN because it's so easy! Pour some heavy whipping cream in a bowl (about half as much as you will need whipped cream because it doubles in size) and sprinkle some sugar in it. Using a hand mixer (you can do this by hand with a regular whisk but your arm will fall off eventually), whip the cream with the whisk attachment until medium soft peaks form. Don't over mix or else you'll end up with butter :)
My other thought that I have to share is this: unless you're serving this for a nice dinner (and want to cover up the weird looking holes) I wouldn't cover this with whipped cream. Serve it separately and allow people to serve themselves how ever much cream and toffee chips they want. If you have leftovers and there's whipped cream and toffee on it, it will all just kind of mesh together and be weird while it sits in the fridge. Especially the toffee and cream.
Seriously, delicious and easy dessert to make. Make Better Than Sex Cake and your next dinner will be.... better than sex? Man, you would think I could come up with some better puns for this...

Woo Hoo!!!

I've decided it's PAST time to revive my blog. I've been baking a lot recently, and I keep thinking I should share these amazing recipes I'm discovering with whoever reads my blog! Also the man I married fixed my computer back at Christmas.... so I can put pictures on it now.... I'm just a procrastinator. The cake I'm show y'all today I actually made back in SEPTEMBER!!! shortly after Mike started training and I moved back in with my mom. It's a good combination of whipped cream and Oreos, two things that I think you can never go wrong with. The only thing that could make this cake any better is if peanut butter was incorporated somehow...


(For the record, no Etnies does not make mixers... That is a sticker my brother put on my mom's...)
I would like to share with you something that I have learned about making cakes (or cupcakes) since I made this one back in September. A really good trick for making sure your cake is moist, whether you're making it from scratch or from a box, is to add a box of pudding mix in with the ingredients! It's amazing!! If you try this, let me know how it works out for you.
Whenever I make a cake like this, that requires you to cut it into four layers, I'm always hesitant to put too much filling between them because I'm afraid I'll run out. Don't do that with this cake! I had plenty of frosting left over and I really wish I had put more in between.
Hey! This cake is naked! Let's get some Oreo crumbs on it STAT!!
Well here you go. The finished cake! Looking back, I should have cut a slice out to show you what it looks like inside and out. Let me tell you, this cake is delicious! And it is SO easy to make! Don't be scared that it's all from scratch. YOU CAN DO IT!!!!
Here's the link to the recipe. It's from Family Circle magazine, and they require you to have a log on to access their FREE recipes (they have some other really great cake ideas/recipes), so if you really want to try this and that link doesn't take you to it, then just create a log-in! Simple as that and totally worth it! MAKE THIS CAKE NOW!!!!
(p.s. I'm baking a completely different cake as I write this, one that is MUCH easier. I'll take some pictures and post it later. Does anyone else think that listening to Erasure while baking a cake somehow makes it turn out better?)

Ay me, it was delicious but oh dear...

I promise there really was a baking project this past weekend. I'm just having a hard time locating my camera that I took the pictures on... I was at my mom's for the weekend so part of me is concerned I might have left it there... Regardless, I'll go ahead and let everyone in on the recipe because it is SO GOOD!!!
My little sister graduated on Saturday (when did my little sister who is taller than me get old enough to graduate??) so for her graduation meal, which included entirely too much food to begin with, I made a white chocolate raspberry cheesecake. I can tell you right now, I could make this on a weekly basis and probably wouldn't ever get sick of it. I think my favorite part of it is you don't melt the white chocolate before adding it, so when you're eating it you occasionally bite into a piece that has a partially melted chocolate chip...that might sound weird, but it's just divine.
Here is the recipe. I HIGHLY recommend it. Also, as soon as I have pictures, I will post them. Y'all definitely shouldn't miss out on seeing my 2 year old niece eat the cake :).

Pound Cake

Cake two weeks in a row. Can you really have too much cake though? I was inspired by Mike's co-workers for this week's deliciousness. Probably 90% of what I make ends up at his job. His co-workers are great. They really boost my ego by eating everything I send with Mike to work :) The thing about baking is, you have so much fun baking something but then if there's no one around...you're probably going to eat everything...So they are quite a blessing! I told him I'd like to get some requests for what they want next and this is what I got:

Lemon Bars

Anything chocolate or lemon

“I loved the peanut butter cookies. Those have been my favorite so far.”

“If I did have to vote, it would be for plain old chocolate chip cookies.”

“All I want to know is did you tell her about the Bake Sale coming up? I’m sure her goodies will go fast. I would like to see some bread or muffins, like blueberry or pound.”

“Definitely a cheesecake.”

“Yes – Chocolate chip cookies are great – especially oatmeal chocolate chip (this way you can feel like you are eating a HEALTHY cookie – sort of…)”

“I like anything with chocolate and peanut butter.”

“Oh, please thank your wife for making these delightful treats to get us through our long, stressful workdays!”


Out of all that, the pound cake part stuck out to me. I've never made one and I've always wanted to. It's so good! It's sitting on my kitchen counter right now and I'm living in fear of it not living until tomorrow for Mike to take to them...


I am always apprehensive of cakes coming out of pans if there isn't parchment paper in them.


But this one came out PERFECTLY!!! I did a little happy dance around the kitchen after I dumped it out of the pan. I really did.


Easiest glaze ever.


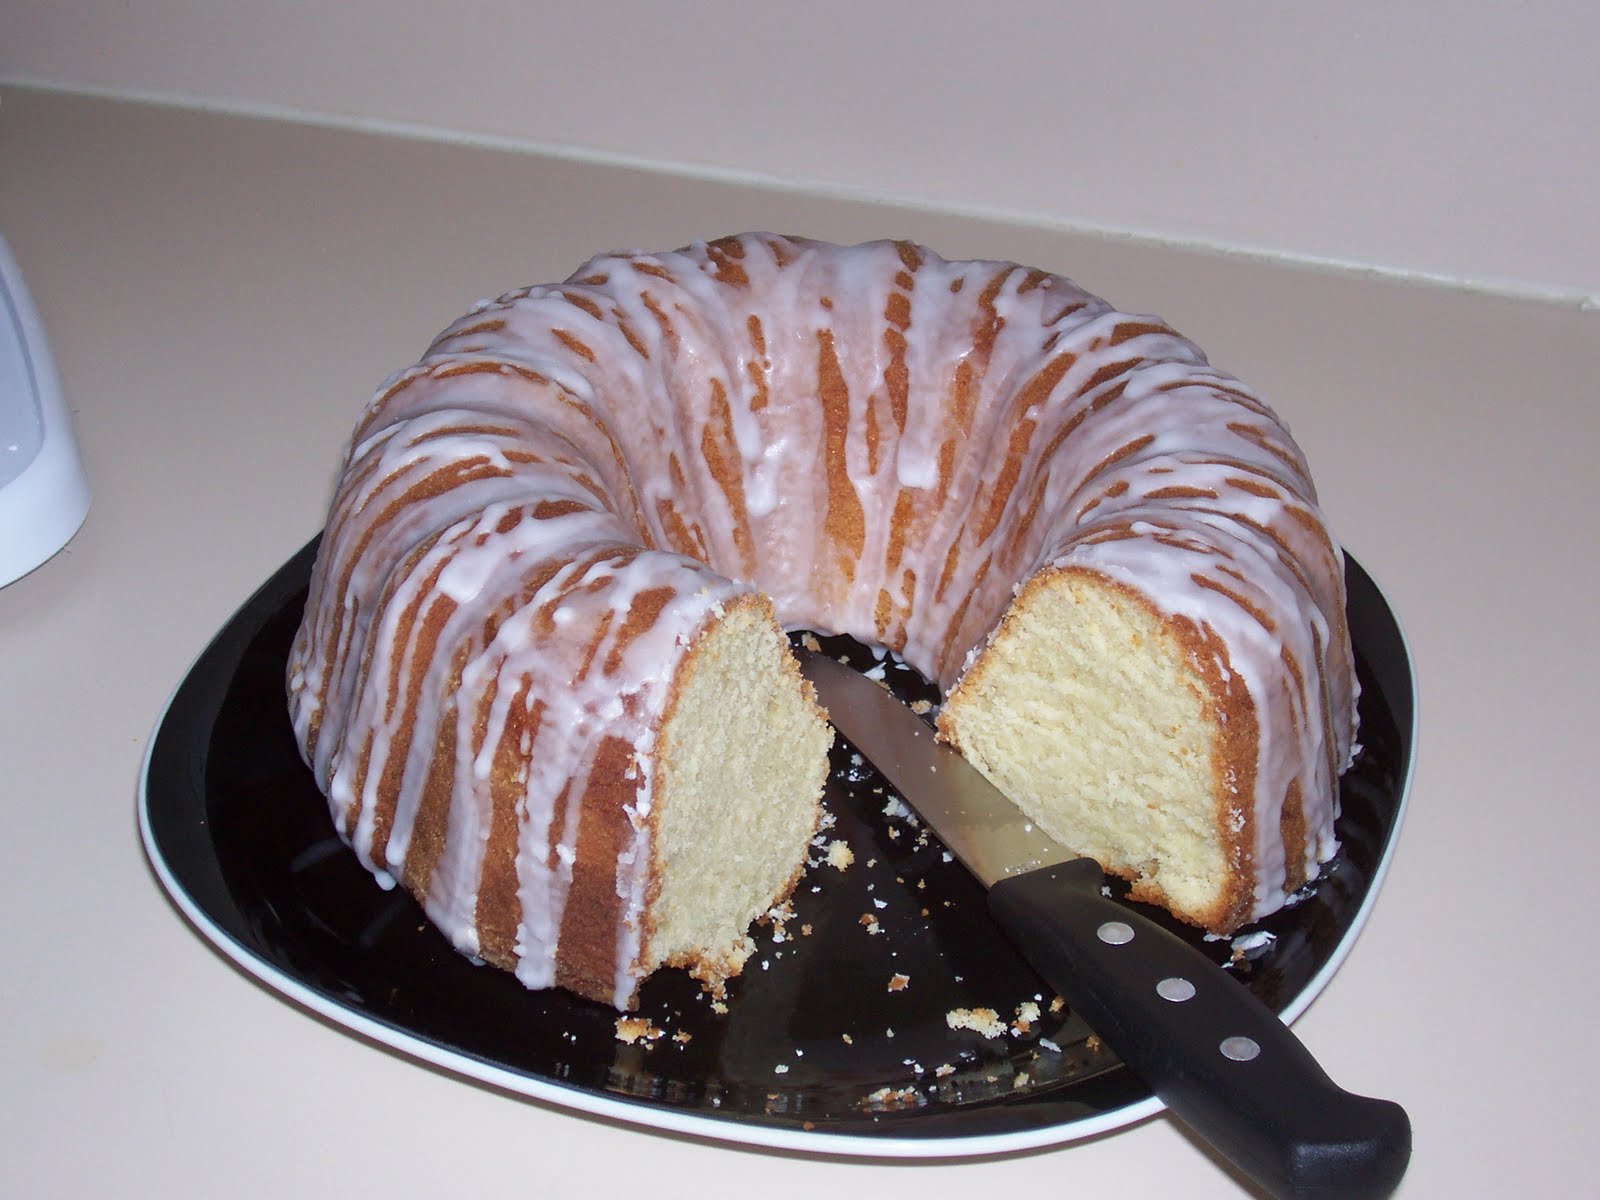
Doesn't that look delicious? It is.


POUND CAKE


1 cup unsalted butter, softened
2 3/4 cups all-purpose flour, plus more for dusting pan
1/2 teaspoon baking soda
1/2 teaspoon salt
1 3/4 cups sugar
6 large eggs
1 tablespoon vanilla extract
1 cup sour cream blended with 1/4 cup milk
1 cup confectioners' sugar


1. Heat oven to 350. Grease a 12 cup capacity bundt pan with 1 tablespoon of the butter. Add a little flour, tilting pan so flour sticks to butter.
2. Measure 2 3/4 cups flour; pour into small bowl; add baking soda and salt. Whisk together to blend.
3. In a large bowl, beat remaining butter and the sugar on high speed just until pale and fluffy but still grainy. Beat in eggs, one at a time, until smooth. Add vanilla.
4. On low speed, beat in half of the flour mixture, then sour cream mixture. Beat in remaining flour mixture just until blended.
5. Spoon batter into prepared pan. Bake for 1 hour, until cake springs back when pressed. Cool in pan on rack for 10 minutes. Place rack over cake, carefully flip to release cake from pan; cool.
6. Blend confectioner's sugar and 1 to 2 tablespoons water until smooth. Place cake on rack over parchment paper. Pour glaze over, letting it drip down side.