Showing posts with label cream cheese. Show all posts

Scones and Devonshire Cream

Okay. This post most definitely got lost on my camera. I made this almost a month ago. For the finale of "Downton Abbey." Right? That was awhile ago...
Anyways, because it's such an awesome show, I felt that the finale warranted British food of some kind. I met every Sunday night with a fun group of ladies, and we'd watch the episodes together. Most fun! I've always wanted to make legitimate scones and clotted cream, and I've been sitting on a recipe for them for awhile, so I went for it!
I was kind of disappointed? I mean, these are delicious! Especially the cream! Oh man that stuff is good. But I just expected them to taste more British? My mind is a wonder, is it not?

Traditional English Scones
2 cups flour
1/4 cup sugar, plus more for sprinkling (optional)
1/2 tsp baking soda
1/2 tsp cream of tartar
1/8 tsp salt
4 oz (1 stick) cold unsalted butter, cut into 1/2 inch pieces
1 TB grated orange zest
1 large egg
1/4 cup heavy cream, or more as needed
1/4 cup milk, or more as needed
1/3 cup Fat Raisins, drained (optional) (I left these out because I have picky feelings about raisins)
Milk for brushing

1. Place racks in the upper and lower thirds of the oven. Preheat to 400. Line two pans with parchment paper.
2. Sift together the flour, sugar, baking soda, cream of tartar, and salt into the bowl of a stand mixer fitted with a paddle attachment. Add the butter and orange zest and mix on low speed for 1 minute, until the butter and flour are broken down into pieces the size of walnut meats. Use your thumb and forefinger to flatten the pieces. Then take up the mixture and rub briskly between your hands.
3. In a separate bowl, whisk together the egg, cream, and milk. Add to the flour mixture along with the raisins, if using, and blend at low speed just until the dough comes together, about 10 seconds. If it seems dry, add a bit more cream or milk, a tablespoon at a time.
4. Line your work surface with parchment, dust the parchment with flour, and scrape out the dough. Shape into an 8 inch square, about 1 inch thick. You can use a rolling pin for this. Cut the dough into 2 inch squares. If making triangles, cut the squares in half on the diagonal. Flip the scones over and place on the parchment-lined pans (the purpose of this is to add extra fluff, so flip them over for heaven's sake!). Brush with milk, and sprinkle with sugar if desired.
5. Bake for 15 to 20 minutes, until dark golden brown and puffed.

Devonshire Cream
1/2 cup mascarpone or cream cheese, at room temperature
2 tsp sugar
1/4 tsp cream of tartar
1 tsp vanilla extract
1/2 cup heavy cream

Place the cheese in a bowl of a stand mixer fitted with the paddle attachment, or use a large bowl and a hand mixer. Add the sugar, cream of tartar, and vanilla and blend well on low speed. Without stopping the machine, stream in the heavy cream. When well blended, scrape into a bowl or ramekin, cover with plastic wrap, and refrigerate until ready to use (this will keep for a good week or two in a tightly sealed container).


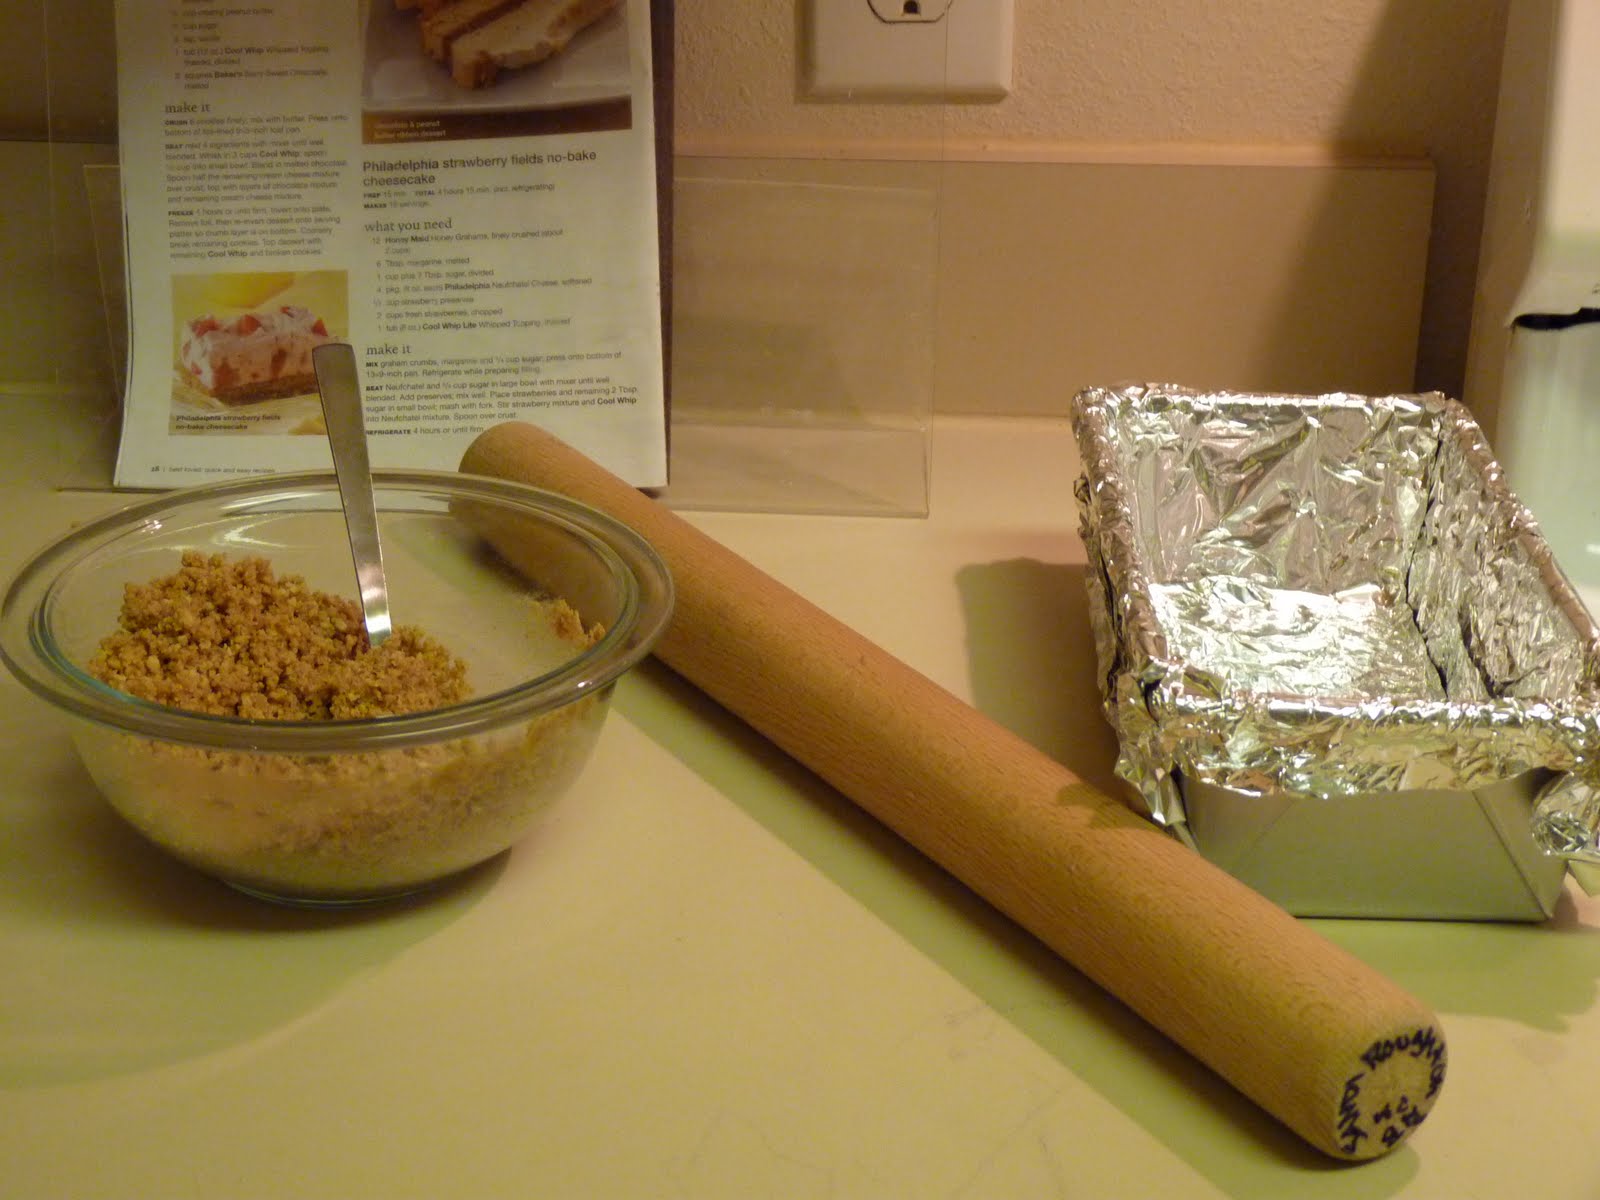
For the record, I mixed the dough by hand, until I added in wet ingredients and then I used a spoon. I just didn't feel that this warranted getting my Kitchenaid dirty.


Here's what it looked like all mixed up, before the wet ingredients.


I made triangles.


And squares :)


Right?


Can you think of a cuter way to take scones, cream, and jam to a "Downton Abbey" finale get-together?


Recipe Source: "Desserts by the Yard" by Sherry Yard

Pumpkin Cream Cheese Muffins

Okay, I have officially decided that eggs have it in for me. First, there was that one time I left them ENTIRELY out of that delicious cake (thank goodness it turned out okay), and THEN I was short one for my chocolate chip cookie pie (which was a huge issue in and of itself), well NOW I go to make muffins, last Friday, for our church's Christmas breakfast, and guess who didn't have any eggs, period? What is with me!?!? I can't even blame it on pregnant brain, because you know that's not going on. Can we just call it Sandi Brain?

Hi. My name is Sandi, and I suffer from Sandi Brain. Probably over use of Sandi Brain is the problem.

Anyways, these muffins are good, but they gave me all kinds of trouble from the minute I laid eyes on the section of my fridge where eggs are supposed to be, and it was empty. The thing that most attracted me to these, was the crumble topping. Just keep reading. You'll see what my "crumble" topping looked like.
I would make these again, but I would probably leave out the crumble. And also, I would probably freeze the cream cheese filling for a good 6 hours or so. You'll see. Just keep reading!!!!

Pumpkin Cream Cheese Muffins

*Makes 24 muffins 

For the muffins:
3 cups flour
1 teaspoon cinnamon
1 teaspoon nutmeg
1 teaspoon ground cloves
1 tablespoon pumpkin pie spice
1 teaspoon salt
1 teaspoon baking soda
4 eggs
1 ¼ cups vegetable oil
2 cups sugar
2 cups pumpkin puree 

For the filling:
8 ounces cream cheese, softened
1 cup powdered sugar 

For the streusel topping:
½ cup sugar
¼ cup flour
4 tablespoons cold butter, cubed
1 ½ teaspoons cinnamon 

To prepare the filling, combine the cream cheese and powdered sugar and whip until smooth. Form into a log on plastic wrap or greased foil, making sure that the diameter is small enough to fit into the well of a muffin pan.  Wrap the log up tightly and freeze until slightly hardened, 1-2 hours. 

To make the muffins, combine the flour, spices, salt and baking soda in a medium bowl.  Mix well and set aside.  In another large bowl combine the eggs, vegetable oil, sugar and pumpkin puree. Mix until well combined. Add in the dry ingredients and mix until just combined. 

To make the streusel topping, combine all the ingredients in a small bowl. Mix together with a pastry blender or two forks until crumbly. 

Preheat the oven to 350°. Line two muffin pans with paper liners. To assemble the muffins, fill each muffin well 1/3 of the way with batter. Remove the cream cheese log from the freezer and slice into 24 equal slices. Place a slice on top of the batter in each muffin well and gently press (don't press all the way to the bottom but just slightly into the batter). Divide the remaining muffin batter evenly among the muffin cups on top of the cream cheese. Sprinkle the streusel topping over the top of the batter. Bake the muffins for 18-20 minutes, until a toothpick inserted into the top of the muffin (about 1/3 of the way down) comes out with moist crumbs. Let cool completely on a wire rack before serving.


Okay, here's my beef with the cream cheese filling: I was expecting it to be like something of a log, easy to slice. I left it in the freezer for 2 hours. As you can see from the chunks of filling, they didn't exactly slice beautifully. So, again, if you make this, plan on freezing the filling for a good 3 hours or more? I don't know, I guess just play it by ear???


The crumb topping. You will note the lack of it looking like crumb topping. And some of it even broke off and didn't look very pretty. I think there was maybe too much butter? I'm not sure. I mixed and mixed and MIXED that stuff until it was all incorporated, but it still just kind of blobbed there. 


This is what it will look like done. Don't get me wrong, despite the need to run to the store for eggs (my fault, not the recipe's) and the issues with the filling and topping, I would definitely recommend this! Does that sound weird to do? They ended up being delicious. But next time, I'm sticking with my gut and making gingerbread muffins.

Recipe source: Mel's Kitchen Cafe

Triple Chocolate Peppermint Treats

Remember how I'm on a quest to find a delicious chocolate, brownie type cookie, with delectable frosting and candy cane kisses on top? Remember? WELL I DID IT!

Okay, so the cookie ended up not being a brownie cookie, but oh my gosh y'all, this is a fantastic treat. I had a few people send me good ideas for recipes that were similar to this, and I can pretty much guarantee I will probably end up making all of them at some point or another...
But then I got a Taste of Home email the other day, and this cookie was in it but with crushed up starlight mints on top. I looked at it and I thought "That's cream cheese frosting, I bet chopped up candy cane kisses would be quite yummy on top of that!" And, well, at the risk of sounding like a genius, I was right.

So here you are, a delicious Christmas time treat! (And I PROMISE, I will be getting my mom's caramel recipe to you BEFORE Christmas...)


Triple-Chocolate Peppermint Treats

Ingredients

  • 1 cup butter, softened
  • 1 cup packed brown sugar
  • 1/2 cup sugar
  • 2 eggs
  • 2 teaspoons Spice Islands® pure vanilla extract
  • 2-1/2 cups all-purpose flour
  • 3/4 cup baking cocoa
  • 1 teaspoon salt
  • 1 teaspoon baking soda
  • 1 cup (6 ounces) semisweet chocolate chips
  • 1/2 cup 60% cacao bittersweet chocolate baking chips

  • WHITE CHOCOLATE FROSTING:
  • 1/2 cup white baking chips
  • 4 ounces cream cheese, softened
  • 3 cups confectioners' sugar
  • 1/3 to 1/2 cup crushed peppermint candies (or candy cane kisses!!!)

Directions:

  • In a large bowl, cream butter and sugars until light and fluffy. Beat in eggs and vanilla. Combine the flour, cocoa, salt and baking soda; gradually add to creamed mixture and mix well. Stir in the chocolate chips.
  • Drop by rounded teaspoonfuls 2 in. apart onto ungreased baking sheets. Bake at 375° for 8-10 minutes or until set. Cool for 2 minutes before removing to wire racks to cool completely.
  • In a microwave, melt baking chips; stir until smooth. Cool.
  • In a small bowl, beat cream cheese and confectioners' sugar until smooth. Beat in melted chips. Frost cookies; sprinkle with peppermint candies. 

*My only side note, I think a teaspoon is a ridiculously small amount of dough to make a cookie. I did about a tablespoon of dough for each and I got 5 dozen out of this. I also put about a tablespoon of frosting on top of each one and it was practically perfect in every way. Also, when sprinkling on the kisses (or mints), push them into the frosting a little bit. And above all else, for the love, please enjoy these! 
Mike said he could've eaten a whole plate of the cookies by themselves, without the topping. It's all good, either way :)


Anticipaaaaaaaaaaaaation!!!! (read that as if Oprah was saying it)


I flattened them slightly, before baking. It's a very thick dough and won't spread much. You don't have to flatten it, but I prefer flat cookies to round ones. This is suddenly sounding like a conversation about boobs...


I know, right?


It's delicious people!!!!


Recipe source: Taste of Home

A brownie, minty fix

My poor baking blog. I think it feels like it's the red headed step child of my two blogs. I've been baking lately, just things that I've posted on here already, and also I'm not baking as frequently as I used to. Did you know ingredients cost money and a lot of the things that I want to bake have ingredients that cost even more money?

Anyways, I'm going to beat everyone to the punch on resolutions and resolve to give more love and care to this here baking blog!

I will start with the fix I needed Sunday night. I looked in my fridge. I thought "What is it that I want?" I glanced in the door, where I keep ridiculous amounts of bags of baking chips, and saw the bag of Andes mints. Then I remembered I have a couple boxes of brownie mix, and a plan was formed.

Basically this is nothing spectacular, but if you're in need of something chocolately and minty, you need to make this.

This is what you'll need:

Also stuff like eggs and water and oil. But anyways, make the brownie mix. Add the mint chunks. I dumped in the whole bag. Actually there was a little less than a whole bag. I don't know what recipe I had that just called for a small amount of Andes mints. In all reality, I probably just had a craving, opened the bag, and ate a few. 

A note on mixing these into the batter: The whole time I was mixing these up, I kept saying to myself "toss the mints in flour first, toss the mints in flour first, toss the mints in flour first."
Did you know that if you're mixing something like Andes mints into batter, if you toss them in flour first, they won't sink to the bottom when baking?
As I was mixing the mint chunks in, I thought "I forgot to toss the mints in flour first." 
So all of mine sunk to the bottom. It was okay. They were still delicious.

So anyways, bake accordingly and then let cool. If you're going to just hack into them at this point, then just hack into them. If you're going to frost them (like I did) then you need to be more patient than me and let them cool completely before frosting them.

Use whatever frosting you want! I looked up an easy cream cheese frosting and it was delish. Also, mix in some green food coloring just to make things more festive. ALSO, go to your Wilton food colorings, give them a stern look and say "From now on, I'm not using you for important things that need to be colored."

And then go out and get some of these, like a lot of them:


Best. Food coloring. Ever.
Y'all, my mom made black frosting with it, and it was black. BLACK!!! 
The quality of AmeriColor is just fantastic!

Anyways, here's what my brownies looked like:


So. More serious blogging on this here blog. Soon. I promise.

Pumpkin Roll

How about we find out what I did with the rest of that can of pumpkin? Shall we? By the way, I have literally been baking up a storm (there is a cloud of confectioner's sugar rotating above my apartment, with frosting rain coming down) all weekend I have a bunch to share with you! A BUNCH I say! But one thing at a time?

So, I have had this recipe in one of my make shift recipe notebooks for awhile. Last Sunday, Mike declared that it was the kind of afternoon where I bake something and I declared the perfection of that because I needed to use the rest of the pumpkin from the snickerdoodles. And this is what he picked. A pumpkin roll. I've always wanted to make one. I've made a couple of cake rolls before, but this one.... well it tasted good. We'll get to my problem later on.


Pumpkin Roll

1 cup cake flour, sifted (do NOT use regular flour!)
2 tsp pumpkin pie spice
1/2 tsp baking soda
1/2 tsp salt
5 large eggs
1 cup sugar
1 cup canned pumpkin puree (I had the PERFECT amount to do a batch of the snickerdoodles and this!)
3 cups creamed cheese frosting
Confectioner's sugar and spiced nuts for garnish (optional-do you really think I put nuts on this? of course not)

For the cake: Adjust oven rack to middle position and heat to 350. Grease 18 by 13 inch rimmed baking sheet and line with greased parchment paper. Whisk flour, spice, baking soda, and salt in medium bowl, set aside. With electric mixer on medium high speed, beat eggs and sugar until pale yellow and thick, 6 to 10 minutes (seriously, beat it that long. Don't think that just mixing until combine is enough. It's going to change color and thickness as you continue to mix it, I promise) Add pumpkin and mix on low until incorporated. Fold in flour mixture until combined. Spread batter evenly in prepared pan. Bake until cake is firm and springs back when touched, about 15 minutes. Before cooling, run knife around edge of cake to loosen and turn out onto clean sheet of parchment paper that has been dusted with confectioner's sugar. Gently peel off parchment attached to cake and discard. Roll cake and fresh parchment into log and cool completely, about 1 hour.

To assemble: Gently unroll cake and spread with frosting, leaving 1 inch border at edges (you could probably go within a half of an inch...) Re-roll cake snugly, leaving parchment behind. Wrap cake firmly in plastic wrap and chill completely, at least 1 hour or up to 2 days. Remove plastic, dust with confectioners' sugar and garnish with spiced nuts.

Here's the cream cheese frosting recipe I used (but you can use your own, just have about 3 cups worth):

Fluffy Cream Cheese Frosting - makes 1 1/2 cups, enough to frost 12 cupcakes

4 TB unsalted butter, softened but not super soft and warm
1 cup confectioners' sugar
4 ounces cream cheese, softened, cut into 4 pieces (soften at room temp about 15 minutes, do not soften in the microwave or the texture of the frosting will be too runny)
3/4 tsp vanilla extract

With electric mixer on medium high speed, beat butter and confectioners' sugar until light and fluffy, about 2 minutes. Add cream cheese one piece at a time, beating thoroughly after each addition. Add vanilla and mix until no lumps remain.


Here's the cake after baking. Kind of spongy looking.


And yes, it should definitely look like it has paper rolled into it when you roll paper into it...


Finished product!!! Pretty right? Wait...


See? As I said before, I've done cake rolls but I honestly don't know what I did wrong this time around. I rolled it into parchment paper after I took it out of the oven, I let it cool completely before unrolling it, and then when I did unroll it, it snapped in 2 places! I was so mad. It still tasted yummy though.

But seriously, if anyone has experience with this, or can give me any ideas of what I can do differently so this doesn't happen again, PLEASE impart your wisdom! I'm at a loss here... But still! Yummy! I mean hello, it's pumpkin and cream cheese. Can you really go wrong?

Recipe Source: Cook's Country

Chocolate and Peanut Butter Ribbon Dessert

This recipe is seriously the epitome of easy peasy, mac and cheesey. I'm going to have to start saying that phrase more often... Anyways, great recipe that I got from some Kraft book somewhere. There is absolutely no baking, you get to beat cookies into submission, and it has peanut butter. I think there's something for everyone there!!

Chocolate and Peanut Butter Ribbon Dessert
12 Nutter Butter cookies, divided
2 TB butter, melted
1 pkg. (8 oz) cream cheese, softened
1/2 cup creamy peanut butter
1/2 cup sugar
2 tsp vanilla
1 tub Cool Whip whipped topping, thawed, divided (OR you can be awesome like me and just whip your own. Whip 2 cups of heavy cream and you are on your way to Legit Whipped Cream City.)
2 squares baking chocolate, melted

Crush 8 cookies finely; mix with butter. Press onto bottom of foil lined 9x5 inch loaf pan.
Beat next 4 ingredients with mixer until well blended. Whisk in 3 cups whipped cream; spoon 1/2 cup into small bowl. Blend in melted chocolate (to the 1/2 cup in the small bowl). Spoon half of the remaining cream cheese mixture over crush; top with chocolate mixture and then top that with the rest of the cream cheese mixture.
Freeze 4 hours or until firm. Invert onto plate. Remove foil, then re-invert dessert onto serving platter so crumb layer is on bottom. Coarsely break remaining cookies. Top dessert with remaining whipped cream and broken cookies.

*Let me just tell you right now, I HATE doing dishes. The only thing I hate more is doing laundry. Anyways, I let this freeze overnight, and because of the foil lining and how hard it had set, I was able to set this on the serving platter and just peel off the foil. I didn't see the need to use the "middle man" plate before the serving dish. Why dirty an extra dish?!!?


On the right, you'll see your standard smothered in foil bread pan. That's buttery, cookie, crushed goodness there on the left and a good 'ol whackin' stick in the middle (aka my rolling pin).


Here are the peanut butter and whipped cream! Hindsight is 20/20; I should've taken a picture of the chocolate mixture as well... Special thanks to HEB for adding the spout/lid onto their heavy cream containers! If I had a gold star, you would be getting it.


This is what it'll look like before going in the freezer. I covered it with plastic wrap.


Isn't that yummy looking? It is. This is only half of the one I made. The other half went downstairs to the missionaries.

Ooey, Gooey Chocolate Butter Brownies

The first time I was introduced to these AMAZING brownies was last year at girl's camp. A very sweet woman took pity on all of the stake leaders and brought us these along with homemade ice cream. We were in heaven, and as a way of showing our gratitude, began demanding the recipe. She was kind enough to share :) I hope that you enjoy! These really are quite ooey and gooey.

Ooey, Gooey Chocolate Butter Brownies
Ingredients:
2 sticks of butter melted (separately)
1 (18.25 oz) package chocolate cake mix (I used Devil's)
3 eggs
1 (8 oz) package cream cheese, softened
3 to 4 TB cocoa powder
1 (16 oz) box powdered sugar
1 tsp vanilla
1 cup chopped nuts (optional)

Directions:
Preheat oven to 350.
Lightly grease a 9x13 pan. In a large bowl, combine the cake mix, 1 egg, and 8 TB (1 stick) of melted butter, and stir until well blended. Pat mixture into prepared pan and set aside. In a stand mixer, or with a hand mixer, beat the cream cheese until smooth. Add the remaining 2 eggs, and the cocoa powder. Lower the speed of the mixer, and add the powdered sugar. Continue beating until ingredients are well mixed. Slowly add the remaining 8 TB (1 stick) of melted butter, and the vanilla, continuing to beat the mixture until smooth. Stir in nuts, if using, with a rubber spatula. Spread filling over cake mixture in pan.
Bake for 40 to 50 minutes. Be careful not to overcook; the center should still be a little gooey when finished baking. Let cake partially cool on a wire rack before cutting into pieces.


The cake mixture is going to be thick enough that it will stick together like this.


Just something I like to do, before turning on the mixer, I move the beaters around to partially mix in the powdered sugar. I don't really want it looking like Christmas in my kitchen :)


When these brownies are finished baking is "debateable." It really depends on how gooey you'd like them to be :) I bake mine for 40 minutes and it looks like this. Just so you know, there's 3 layers to these brownies: the bottom cake layer, the very gooey middle, and the thin crust that bakes on top.


While it cools, the top will sink down, but that is okay. One of my favorite things about this brownie is the crumbly top.


Here they are finished :) These two were still relatively warm so they were just ooey gooey all over the place. The longer they sit, the more they set up.

Black Bottom Cupcakes

Drop everything and make these right now! They are SO good! Like most things that I bake, I did these for Mike because he "needed something good to eat." I have a really bad habit of stalking the internet for recipes, putting them in giant notebooks, and never cooking/baking them. So, lately, when I've had a desire to make something different, I've decided to delve through my volumes and find something there rather than just add to the madness :) This one has been in its notebook for so long, I don't even remember where I got it from! It even says "Submitted by Erin" on it. I HAVE NO IDEA WHO ERIN IS!!! Anyways, I think you're really going to love it!

Black Bottom Cupcakes
8 oz cream cheese
1 egg
1/3 c. sugar
1/8 tsp salt
1 (6 oz) pkg semisweet chocolate chips (I would recommend the mini ones! They're absolutely perfect for this!)
1 1/2 c. sifted flour
1 c. sugar
1 tsp. soda
1/4 c. cocoa
1/2 tsp. salt
1 c. water
1/3 c. oil
1 Tbs. vinegar
1 tsp. vanilla

Beat cream cheese, egg, sugar (1/3 c.), and salt in a bowl. Stir in the chocolate chips (Again, I can't say enough that you need the mini ones!). Set aside; beat all remaining ingredients until blended. Fill cupcake liners 1/3 full. Top each with a heaping spoonful of cream cheese mixture. Bake at 350 for 25-30 minutes. Makes about 1 1/2 dozen.

Cream cheese frosting

4 oz cream cheese, softened
3 Tbs. softened butter
1 tsp. vanilla
1 1/4 to 1 1/2 c. powdered sugar

Beat together, adding milk and more powdered sugar to desired consistency and quantity. *If you have the desire to pipe this onto the cupcakes, you will need to double or even triple the amount of ingredients you use.


You really don't want to fill up the liners a whole lot...


...because once you add the cream cheese to it, it's going to fill up fast! Also, you really should use liners. I know there are those of you out there who feel that cupcake pans should be greased and floured. However, because of the heavy, cream cheese center, if you don't use a liner here, when you pull them out they'll just collapse everywhere.


Some of them might sink in the middle, where the cream cheese is, when they're done. It's okay!


Simply frost and VOILA! These are so easy to make and sooooo delicious! Those mini chips really make all of the difference :)
(Those sheep keep showing up... I think that, like the toys in Toy Story, they come to life when I'm not in the kitchen...)

Good Heavens!

For the love people, why do you let me go so long without sharing a treat with you? My apologies... I moved back to Austin and then Mike came home and things have just been a bit hectic. I'm glad to be back in Austin though and I am ESPECIALLY glad to have Mike home! Even if only for 2 weeks... But that is another story.

So I totally meant to post this like, a week ago, so that if you needed an idea for St. Patrick's Day dessert then you could use this. But then I moved back to Austin and then Mike came home and-oh wait. It's a little late, but you can definitely use it next year! I just love St. Patrick's Day. Mike and I went to a celebration in downtown Austin last night to see some dancers from the totally awesome school I dance with perform (I wasn't dancing because hello I've been gone from here for 9 months), and he was telling me how sad it must be for a Mormon's favorite holiday to be an alcohol related one. And to that I say 'Tis Blarney! You don't need the alcohol to have fun! I just love Irish things so much... I am really digressing with this post. There is really nothing Irish about this dessert, it's just really good and green. And easy.


Mint Brownie Pie
Ingredients:
6 TB butter
2 oz unsweetened chocolate
1 cup sugar
2 eggs, lightly beaten
1/2 tsp vanilla
1/2 cup flour

Filling:
1 package (8 oz) cream cheese, softened
3/4 cup sugar
1/2 tsp mint extract
Green food coloring
1 carton (8 oz) frozen whipped topping, thawed - I know, I know, I know, I HATE whipped topping, but when trying a new recipe that calls for it I'm hesitant to make my own. You can go ahead and make your own if you want. It would work.
1/4 cup semisweet chocolate chips, melted

Directions:
In a large saucepan, melt butter and chocolate. Stir in sugar until smooth. Add eggs and vanilla. Stir in flour until well blended.
Pour into a greased 9 inch springform pan. Bake at 350 for 18-20 minutes (mine took about 25...) or until a toothpick inserted near the center comes out clean. Cool on a wire rack.
In a large bowl, beat cream cheese and sugar until smooth. Beat in extract and food coloring if desired. Fold in whipped topping. Spread evenly over brownie layer. Cover and refrigerate for at least 1 hour.
Remove sides of pan just before serving. Melt chocolate chips, drizzle over top. Garnish with additional whipped cream and chocolate chips if desired.
This picture is posted for no other reason than it just being chocolate.


This is the filling mixture before I added whipped cream...


...and this is it after I added it. Still green, but if you want it to be darker be sure and add more food coloring before you put in the whipped cream. As I was folding it in, I thought of that but it was too late.
Well there you go! My Irish shakers think you should definitely use this for the next Irish/mint/brownie/chocolate event in your life! It's good stuff.

Brownie and Cookie Goodness

This is a bit of a late weekend update but it was quite an unusual weekend. I'm sorry for the late post! But I do have two very delightful recipes I would like to share with whoever is out there reading this :) When I got married one of the best gifts I got was The Taste of Home: The Ultimate Cookie Collection. Special thanks mom!

The first recipe is one of my all-time favorite cookie recipes. These are DELICIOUS! And it makes a huge batch, about 5 1/2 dozen!!


Special Oatmeal Cookies


1 cup butter, softened
1 cup peanut butter
1 cup sugar
1 cup packed brown sugar
2 eggs
1 tsp vanilla
3 cups oats
2 tsp ground cinnamon
1 tsp baking soda
1/4 tsp ground nutmeg
1 1/2 cups semisweet chocolate chips
Drizzle: 1 cup white chocolate candy coating melted and 1 cup dark chocolate candy coating melted (I just used white chocolate and milk chocolate chips...)


1. In a mixing bowl, cream butter, peanut butter, and sugars. Add eggs, one at a time, beating well after each addition. Beat in vanilla. Combine oats, flour, cinnamon, baking soda and nutmeg; gradually add to the creamed mixture. Stir in chocolate chips.
2. Roll into 1 inch balls. Place 2 inches apart on a greased baking sheet; flatten to 1/2 inch thickness. Bake at 350 for 10-12 minutes or until golden brown. Remove to wire racks to cool*.
3. Drizzle with white coating in one direction, then with dark coating in the opposite direction.


*I just want to take this moment to say, with every kind of cookie I have ever baked, I leave them on the cookie sheet for a couple minutes before putting them on a paper towel/foil/cooling rack/etc. If you do it immediately it's just going to fall apart and make a delicious mess.


Also I would like to say that my favorite part of this cookie is the 1/4 tsp nutmeg. It adds that perfect bit of flavor that makes these cookies awesome!


The 2nd recipe I'd like to share is for Cookies and Cream Brownies! YUM!!! I want to post a picture but the picture posting thing is being ridiculous so I challenge each of you to make these for yourself and figure out what they look like :)


Cream cheese layer:
1 package (8 oz) cream cheese, softened
1/4 cup sugar
1 egg
1/2 teaspoon vanilla


Brownie layer:
1/2 cup butter, melted
1/2 cup sugar
1/2 cup packed brown sugar
1/2 cup baking cocoa
2 eggs
1/2 cup all purpose flour
1 tsp baking powder
1 tsp vanilla extract
12 cream-filled chocolate sandwich cookies, crushed


1. In a small mixing bowl, beat the cream cheese, sugar, egg and vanilla until smooth; set aside.
2. For brownie layer, combine butter, sugars and cocoa in a large mixing bowl; blend well. Add eggs, one at a time, beating well after each addition. Combine flour and baking powder, stir into the cocoa mixture. Stir in vanilla and cookie crumbs.
3. Pour into a greased 11x7 pan. Spoon cream cheese mixture over batter; cut through batter with a knife to swirl. Bake at 350 for 25-30 minutes or until a toothpick inserted near center comes out with moist crumb. Cool in pan on wire rack.


Ok can someone please tell me where the heck I can find an 11x7 inch baking pan?!?! I have never heard of such a thing! For this recipe I used an 8x8 and baked it for 32 minutes since it was thicker. If anyone has any thoughts on this matter, let me know :)

Ginger Lemon Poppyseed Cheesecake Cupcakes

Isn't that a mouthful? Ginger lemon poppyseed cheesecake cupcakes. A really good mouthful :) This is another creation I got from the wonderful lady over at http://www.cupcakeproject.com/. What is it about combining lemon and poppyseeds that is just wonderful??

Sad news on this blog. Mike's mom wanted her camera back...so the quality of the pictures is...well they're there and that's what matters!


Look at that. Cream cheese. This is the reason a diet would never work for me.


I just want to take this moment to say, I love my Kitchenaid mixer.


Before.


After.

At first I thought "Oh no! They're cracked and sinking!" But they're supposed to.
And then you cover them in delicious whipped frosting and it doesn't matter what the top looks like anyway.

Exhibit A:


A couple things I should have done differently with this post. First, I didn't even THINK of unwrapping one of them to take a picture of the 3 layers: gingersnap crust, lovely yellow cheesecake sprinkled with black seeds, and ginger specked frosting.
Second, after frosting the cupcakes, I left them on the counter overnight...I don't know about you, but I am not willing to eat a dairy product that's been left out overnight. Mike was sad. So I made him chocolate chip cookies. I should post that recipe sometime...

I HIGHLY recommend this cheesecake/cupcake recipe. It's remarkably easy for their unique combination of flavor and textures, and it has great options for making it look extra special. Make these cheesecake/cupcakes!!!!! Now!!!

Chocolate Cheesecake...Droooool...

Is there anything more grand than waking up on a Saturday morning and baking a cheesecake? If there is, I don't want to know about it.

I was invited to a girl's night and asked to bring a chocolate dessert. I've made a couple of cheesecakes before, but I always get this anxious feeling of what happens if you cut into it and the whole thing collapses on itself? Luckily that didn't happen, and I think everyone liked it!

As a side comment, did you know that if you put a memory card in a camera it's more likely to retain the pictures? I have a bit of a picture shortage this week :)


Going into the pan! Getting ready to lick the spoon!


Warm out of the oven.


Now if this guy here had eaten any, I would have had a horrible vomit mess to clean up. No thank you.
For a cheesecake recipe, this turned out to be quite easy, and I highly recommend it!
Chocolate Bliss Cheesecake
Prep: 30 minutes, Bake: 1 hour
Total: 5 hours 30 minutes (includes refrigeration)
18 Oreo Cookies, finely crushed (about 1 1/2 cups)
2 TB butter or margarine, melted
3 packages (8 ounces each) cream cheese, softened
3/4 cup sugar
1 tsp vanilla
1 package (8 squares) semi-sweet baking chocolate, melted, slightly cooked
3 eggs
cocoa powder optional
1. Preheat oven to 325 if using a silver 9-inch springform pan, or 300 if using a dark, nonstick 9-inch springform pan. Mix cookie crumbs and butter; press firmly onto bottom of pan.
2. Beat cream cheese, sugar and vanilla in large bowl with electric mixer on medium speed until well blended. Add melted chocolate; mix well. Add eggs, 1 at a time, mixing on low speed after each addition just until blended. Pour over crust.
3. Bake 55 minutes to 1 hour or until center is almost set. Run knife or metal spatula around rim of pan to loosen cake; cool before removing rim of pan. Refrigerate 4 hours or overnight. Dust top of cheesecake with cocoa powder. Store leftover cheesecake in refrigerator.