Showing posts with label bread. Show all posts

Kouign Amans

Just a heads up, this is a picture heavy post.

Did you think I had forgotten my goal to bake one recipe a month out of Martha's baking handbook? Yes I thought so too, but then as I was falling asleep Thursday, I thought "I haven't baked any Martha Stewart this month!" So I set out on Friday to remedy the situation.
And remedy I did.

You might be wondering "Sandi, what the freak is kouign amans?" And I'll go ahead and let you know that you just pronounced it wrong. It's pronounced queen ah-man. See? You're learning from me already.

Okay look, I won't lie to you. This. Is. Time. Consuming. VERY. Time. Consuming. 
It took me about 24 hours to make this, when all was said and done. BUT! I will tell you right now, it was all worth it to tear one of these things open, see all of the buttery, flaky layers and say to myself "YOU JUST BAKED A FRENCH PASTRY FOR THE FIRST TIME IN YOUR LIFE."
It's a good feeling. 
Are these delicious? Yes. Are they healthy? Yes. Was I lying just now when I answered the second question? Yes. Did they turn out uglier than Martha's? Yes. Did Mike even care about that when he inhaled them? No.
The bottom line is, these are fantastic, but not easy. If you're up for a challenge, DO IT!


Kouign Amans

1 3/4 cups warm water (about 110 degrees)
1 envelope yeast (2 1/4 tsp)
1 3/4 pounds (about 5 cups) flour, plus more for dusting
1 1/2 tsp salt
4 sticks butter, cold; plus 2 TB melted
Sugar for dusting and sprinkling

In a bowl, stir the yeast into the warm water until dissolved. Let stand until foamy, about 5 minutes. In the bowl of an electric mixer fitted with the dough hook, combine the flour, salt, and the melted butter on low speed. Add the water-yeast mixture, and continue to mix until well combined, about 2 minutes.

Cover the bowl with plastic wrap, and let rise in a warm place until doubled in bulk, about 1 hour. Punch down the dough; cover with plastic wrap, and place on a large baking sheet. Transfer to the refrigerator, and chill for 2 hours.

Meanwhile, lay the remaining 4 sticks of butter side by side on a nonstick baking mat (just use parchment paper, trust me); roll into an 8 inch square, about 1/2 inch thick. Wrap butter in parchment paper and refrigerate until firm, about 30 minutes.

On a lightly floured work surface (you'll need a lot of flour the first time around), roll out the chilled dough to an 18 inch square. Place the chilled butter square on top of the dough, with each side of the butter facing a corner of the dough, in a diamond fashion. Fold the corners of the dough over the butter to enclose, and pinch the edges to seal. Roll out the dough into a 24 by 8 inch rectangle. Fold the dough into thirds as you would a business letter, aligning the edges carefully and brushing off any excess flour. The goal is to ensure that the butter is distributed evening throughout so the pastry will puff evenly when baked. Wrap the dough in plastic; chill for 20 minutes. This completes the first of three turns.

Repeat the rolling and folding process two more times; start with the flap opening on the right, as if it were a book, and refrigerated at least 1 hour between turns. To help you remember how many turns have been completed, mark the dough after each one: one for the first, two for the second, three for the third. After the third turn, wrap dough in plastic, and refrigerate 6 to 8 hours or overnight.

Preheat the oven to 425. Line two baking sheets with nonstick baking mats (USE PARCHMENT PAPER). On a well-sugared work surface, roll out dough to a 24 by 12 inch rectangle, about 1/4 inch thick. Using a pizza wheel or pastry cutter, cut dough into 18 4-inch squares. Working with one square at a time, fold each corner toward the center, pressing down firmly to seal, resulting in a smaller square. Repeat, folding corners toward the center and firmly pressing down. Sprinkle generously with sugar, about 1 teaspoon per pastry. Place pastries on prepared baking sheets as you work. Cover loosely with plastic wrap; let rise in a warm place until slightly puffed, 30 to 40 minutes.

Bake, rotating sheets halfway through, until the pastries are golden brown, 35 to 40 minutes. Immediately transfer to a wire rack to cool completely. 
These are best eaten the same day they are made.


This is about what the dough looks like after mixing a couple of minutes. See the drier part on the bottom right? That's flour that still needs to mix in, so if you have to knead it by hand a little more, it's okay.


Here it is before going in the fridge.


Let me go ahead and tell you right now, rolling a giant square of butter is not as easy as I always envisioned it being. I recommend doing this part on parchment paper. You'll be wrapping it in paper anyways.
Don't worry though, if your husband is tired enough, he'll nap right through your rolling pin slamming into the counter repeatedly.


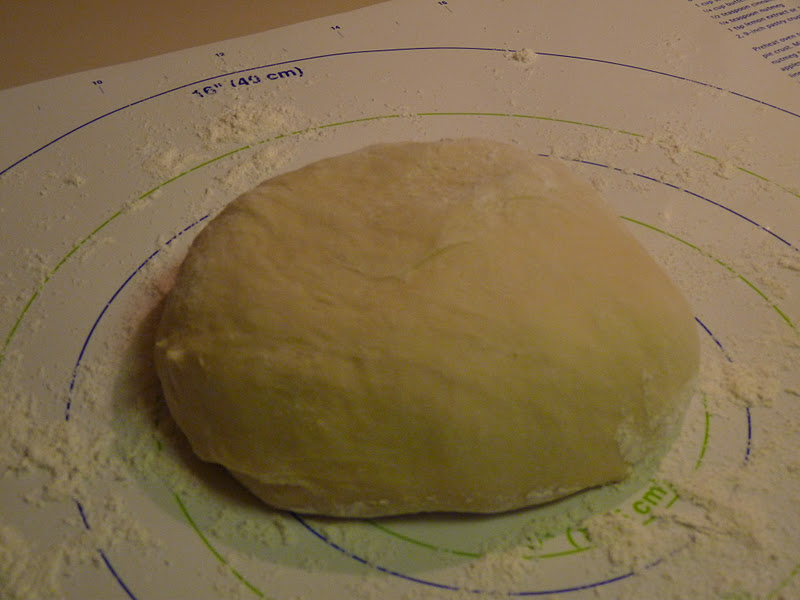
Here's the dough after the first refrigeration.


This is how the butter should be placed on the dough.
Also, my pastry mat was AWESOME for this. It really helped me with the measurements. I'm horrible at eyeballing those kinds of things, so if you have one, use it.


This is basically what it should look like after each turn.


And it will continue to rise a little while it's in the fridge. That's okay, it's supposed to.


On my last turn, the top half ended up with a bunch of butter on it. I think I needed to incorporate the square of butter better. I really couldn't tell you since this was my first time making a pastry like this.


First fold of the square...


And second.


These look good, in theory. Except for the ones on the left. They obviously took the short bus to the oven. 
It was SO DIFFICULT keeping these pinched and tucked down while they rose, and then while they baked. The first pan I baked, the one on the left, came unfolded and kind of looked like flowers? So I turned the other ones upside down for the first half of baking and then right side up for the second half.


(sorry it's blurry) The ones on the right I left normal, the ones on the left I started out upside down. I don't really like how either of them looked, but they were delicious!


This is about how it should look on the bottom.


Look at that flakiness!
These have such a nice taste/texture. Because the outside is covered in sugar, initially you'll have a crunchy sweet bite, but then it dissolves into the butter softness of the inside. Oh man these were good.


I can't tell you how fun this was to clean. Just use parchment paper and throw it away when you're done!!! 

Recipe source: Martha Stewart's Baking Handbook


Orange Pull-Apart Bread

Can you tell I'm trying to fit in citrus concoctions before they go out of season? Two orange recipes in a row. It's ridiculous. RIDICULOUSLY DELICIOUS.


I'm not going to lie to you. There was a huge problem with this bread. As I was making it, I was thinking "Hmmm, who could Mike and I share half of this loaf with?" And then we went and ate 2/3 of it after dinner. Like, within 10 minutes time. 2/3 of that puppy was gone. I made an executive decision and since Aleece is practically a next door neighbor to our church (where I was headed to go hang out with a bunch of cool girls), I did a drive by breading. A drive by breading consists of driving by someone's house really fast, throwing bread at their door, and screaming 'PLEASE GET THESE CARBS AWAY FROM MEEEEEE!!!!!!!!!' 
It didn't really happen like that. I stopped by, passed it off to her really fast, told her she didn't have to share (she DID share, but that's okay because her son is cute. Actually all 5 of her sons are cute, but that is neither here nor there), and then went on my merry way. 
Isn't that the best story you've heard all day?


So, my reason for making this bread. Remember the bread that vomited all over my oven? I decided to give pull-apart breads another chance. Thank goodness for second chances. While this one did manage to overflow like the other one did, although it did stay in the pan for the most part, I was smart and remembered to put a foil lined sheet underneath the bread pan to catch any dripping sugar. Or dripping bread parts.


Orange Pull-Apart Bread


Sweet Dough
2 1/2 c flour, divided, plus additional for kneading
1/4 c sugar
2 1/4 tsp (1 envelope) instant yeast
1/2 tsp salt
5 Tbls  milk
4 Tlbs butter
1/4 c water
1 1/2 tsp vanilla
2 eggs, room temp
Orange Paste Filling
1/2 c sugar
4 Tbls orange zest, from 2-3 oranges
4 Tbls margarine, softened

Orange Frosting

2 oz cream cheese, softened
2 Tbls butter, softened
1/2 cups confectioners’ sugar
1/2 Tbls orange juice
1 tsp milk, or more as needed
In a large bowl, combine 2 cups of the flour, the sugar, the yeast and the salt. Set aside.
Put 4 tablespoons of the butter and all of the milk in a small bowl. Microwave, stirring occasionally, just until the butter melts. Allow to cool about 1 minute, then add the water and vanilla.
Pour the butter mixture into the dry ingredients and, using a spatula or a stand mixer fitted with the paddle attachment, stir until evenly combined. Add the eggs, one at a time, stirring until fully incorporated before continuing. If using a stand mixer, replace the paddle attachment with the dough hook. Add the remaining 1/2 cup of flour and mix until smooth. If the dough seems to sticky, add 2-3 more tablespoons of flour. Knead until smooth, about 5-10 minutes in a mixer or by hand on a well-floured surface.
Place the kneaded dough in a well-oiled bowl and cover with plastic wrap. Set aside until doubled in bulk, about 1 hour. In the meantime, grease a standard-size bread pan and prepare the orange paste filling by mixing the sugar and orange zest until damp.
After the dough has risen, roll it out on a well-floured surface into a 20 x 12 inch rectangle. Spread the remaining 4 tablespoons of butter over the entire surface, then evenly sprinkle over the orange paste filling, pressing gently to adhere. Cut the dough into five 4 x 12 inch strips, then stack them all on top of each other so that you have alternating layers of dough and filling. Cut the stack into six smaller 2 X 4 inch pieces. Take the cut stacks and place them in the prepared bread pan with the just-cut 4-inch sides facing up. Use your fingers or a butter knife to fan out the layers a little, if necessary.
Cover the loaf pan with plastic wrap and set aside to double in bulk, about one hour. While you are waiting, preheat the oven to 350F.
Bake the loaf for 25-33 minutes until the top is golden brown. (If top browns too quickly, cover it loosely with foil while it finishes baking.) While the bread is baking, prepare the frosting by creaming the cream cheese and butter together, then slowly adding in the powdered sugar, and finally adding the juice and milk.
Allow to cool in the pan on a wire rack for 10 minutes, then remove the loaf from the pan and allow to cool completely. Drizzle with frosting and devour!

*The only thing I have to say is, I think there is too much glaze. I wouldn't HALF it, but...I just wouldn't put all of it on the bread. Maybe drizzle it on and then leave the rest for dunking? I don't know. It's your bread, do what you want with it.
Get ready for lots of pictures.

The dough is going to look very oatmealy before adding in the additional flour. It's okay if it looks like this. In fact, it should.


I don't know if I've shared this before, but when I proof bread dough, I put it in the oven (turned off), with the light on (just a LITTLE extra heat?) and cover it with a dish towel. 
This particular towel was one given to me at my bridal shower and is signed by many people I grew up admiring. It's pretty great.


Here's the orange, sugar goodness!


Look, I didn't feel like cutting 4 TB of butter when I already had 3 sitting all by its lonesome in the butter compartment of my fridge. Also, 3 was plenty. 2 TB would've worked perfectly. So when you do this, I recommend only using 2 TB of butter.


I dumped the orangey part on it randomly, and then ran my hands over it, lightly, until it covered the surface.


Okay, so cut 5 first. 


And then stack those. STACK THEM!


And cut 6.


Now when you place them in the pan, remember to put un-orange sides against orange sides. Like so.


Here it was after proofing (and can I just say one of the advantages of Texas humidity is that dough doubles within 20-30 minutes?)


Please make note of the weird, torn part on the left. I initially took this out of the oven after 25 minutes and thought it was done. But after some inspecting, I realized it was not, so back in it went! And that explains the ugly part...


Look at all of that delicious looking zest!


Mmmmmm.


Recipe Source: Two Tiny Kitchens

English Muffin Bread

Okay. I've baked a few loaves/forms of bread in my time. I am in no way an expert, but I can find my way around a yeast bread.
This. Was. The. Weirdest. Dough. I've. Ever. Seen.
I love English muffins, and I've always wanted to make some. Typically, they require rings to put the dough in though (to keep the round shape) and I don't have those so I've put it off. When I saw that there was a loaf of bread like unto English muffins, I jumped on it!
I think I know now why English muffins are griddled in rings. The dough was more like batter. If they weren't griddled in rings they'd turn into weird, bready pancakes because they'd spread all over.
The whole time I was making this bread, I kept thinking "I've messed up. I totally messed up somewhere. Something is wrong." But no! I got two awesome loaves of bread from the batter-like dough!
With that being said, I had these puppies mixed up, rising, and in the oven within an hour. AN. HOUR. I know! And if you are timid of yeast breads, try this. It's impossible, IMPOSSIBLE I TELL YOU!, to mess it up.

Also, if you are as fortunate as I am, you will be able to trade one of the loaves for a brand new crepe pan (thanks again Elisabeth!).

Can you shake a stick that that? I tell you that you cannot.

*The original recipe was too lackadaisical for me. I did not like the lack of consideration for the yeast bread making process, so I'm going to adapt it to the way I made it.


English Muffin Bread


2 and 3/4 cups warm water (between 105-115 degrees)
3 and 1/4 teaspoons plus another 1/8 teaspoon yeast 

(I know that's weird but the original recipe was for 4 loaves and I halved all of these, if you want to make it easier on yourself, do 1 and a half packages of yeast)
1 Tablespoon salt
1 and 1/2 Tablespoons sugar
5 and 1/2 cups flour


1. Combine water, yeast and sugar. Let sit for a couple of minutes.
2. Add flour, and then salt. Mix all ingredients well. Let stand until doubled.
3. Distribute dough between 2 greased loaf pans. Let stand until it reaches the top edges of the pans.
4. Bake at 350 for 35 minutes. Brush the tops of the loaves with melted butter and then bake another 10 minutes, or until golden brown.


TA DA! So easy. I recommend toasting a slice and then adding butter and jam. Yum.


Here's what the water/sugar/yeast should look like after a couple of minutes. Just let it sit long enough for the yeast to really activate. You can't mess this up, remember?


Okay, do you see this? Do you see why I thought I was losing my mind? Does this look like DOUGH? NO! But this is what the dough should look like :)


Before rising.


After rising. 
Let it go all the way to the top! Be sure and have the oven preheated so you can put both loaves right in.


Here they are pre-buttering.


Mmmmm. Nice and golden.


Do you see all of the English muffin-like goodness going on there? 
This is really easy and good bread!

Recipe source: adapted from Pinching Your Pennies

Challah


"Every one of us knows who he is and what God expects him to do."


One of the best movie quotes ever, right?


Ah. Jewish bread. I suppose I should've saved this for Passover or something, but who can wait for this kind of thing? If you were to ask me what my favorite bread to make and/or eat is, it would most likely be Challah. I was first introduced to it when I was in culinary school. I didn't think much of it at first. We were in the middle of the "bread block" and so I'd been exposed to all kinds of different breads over the course of 3 weeks or so. Then my chef instructor started braiding it and I saw one completed and I was in love!

CHALLAH IS GORGEOUS!

But then I tasted it.

CHALLAH IS DELICIOUS!

Oh it's so good. It's a really thick dough, there's 4 eggs in it for crying out loud, so it's just.... it's perfection.
The simplest way to present a Challah loaf, as a braid, is to do a regular 3 strand loaf (you know, a regular braid). My personal favorite is 8 strand though, which is what I did for this. If you are wanting something more complicated than 3 strand, let me know and I can pass on directions for 2,3,4,5,6,7,8 strands or even a star shaped loaf.

One thing you need to know about Challah, it is the bread of life. Cutting it with a knife is akin to committing murder. It is customary to tear pieces off. It's really quite delightful to stand around a loaf with Mike and tear off chunks of braids.
Also, this recipe makes two loaves, so I recommend taking one to a friend! Or you can be completely selfish and eat it all for yourself. Which Mike would have done. But we shared.

(and just fyi, this is pronounced like "holla" except not so much in a ghetto way, more of a Hebraic way, are we kosher on that? Good.)

Challah


Ingredients

  • 2 packages (1/4 ounce each) active dry yeast
  • 1 cup warm water (110° to 115°)
  • 1/2 cup canola oil
  • 1/3 cup sugar
  • 1 tablespoon salt
  • 4 eggs
  • 6 to 6-1/2 cups all-purpose flour
  • TOPPING:
  • 1 egg
  • 1 teaspoon cold water
  • 1 tablespoon sesame or poppy seeds, optional

Directions

  • In a large bowl, dissolve yeast in warm water. Add the oil, sugar,
  • salt, eggs and 4 cups flour. Beat until smooth. Stir in enough
  • remaining flour to form a firm dough. Turn onto a floured surface;
  • knead until smooth and elastic, about 6-8 minutes. Place in a
  • greased bowl, turning once to grease top. Cover and let rise in a
  • warm place until doubled, about 1 hour.
  • Punch dough down. Turn onto a lightly floured surface; divide in
  • half. Divide each portion into thirds. Shape each piece into a
  • 15-in. rope.
  • Place three ropes on a greased baking sheet and braid; pinch ends to
  • seal and tuck under. Repeat with remaining dough. Cover and let rise


You don't have to give the yeast time to activate in the water, before adding in the other ingredients, so it's pretty much going to look like this.


I find it hard to make Challah without a scale and a bench scraper. I like for my loaves to be as even as possible, so when I divide the dough in half, initially, and then divide both halves into sections for the strands, I weigh the dough to make sure it's all the same. You could definitely eye-ball it, I'm just horrible at doing that.


Do you remember when I made bread sticks that left Olive Garden's in the dust? And do you remember how I said you have to take your time rolling out the dough so as not to overwork it? The same thing applies here.
First, roll each section (it doesn't matter if you're doing 3 or 7 or 25 - that would be a cool braid! 25 strands!) into a ball.


Then start rolling the strands out, a little at a time. It's important to take turns with each strand, and let them rest as you work on the other ones. You don't want to overwork the dough.

Also, you will get bubbles in the dough. If you don't get bubbles, call me right up, because you are some sort of bread-making genius. When you get bubbles, fight every natural urge to pop them (I know! It's hard!), and instead use a sharp knife to slice the bubbles open and let the air out.


Roll them out to about this long!


When you start braiding, pinch the top of the strands really tightly! And also, braid tightly. I did one loaf where I was very particular about the rolling out and pinching and braiding (I like being a perfectionist with Challah). The other loaf, I did it half-heartedly. I wanted to show y'all the difference between taking care and not giving one. 
Don't worry, the pretty one went to my friends.


At this point, pinch the OTHER end of the strands together. I like to cut a little of the excess dough off both ends.


If you do cut excess dough off the ends, pinch the ends together even more! Okay go ahead and pinch them anyways. Then tuck them underneath and, guess what!, pinch the dough there so that it all stays together! :)

What is with all of this pinching, Sandi? Well, I will tell you. If you don't pinch properly, it will all go to pot when it's baking.


Do you see how the one on top is just not very pretty compared to the one on the bottom?


Look what happened when it baked! Not my worst Challah baking experience (one time, half of a loaf came completely unbraided; do you see why I'm anal about the pinching and tight braiding?), but still, the top one is definitely prettier.


See how it came apart and looks torn? Pinch pinch pinch! Tighten those strands as you braid!


Beautiful, if I may say so myself.
I was very upset to find that I was out of sesame seeds (and yet had plenty of poppy seeds, bleh, I don't like those on Challah), or else I would've put those on with the egg wash. I highly recommend adding those before baking!


L'Chaim!!


Recipe Source: Taste of Home

Everyday Cinnamon Rolls

Remember how I'm on a lifelong quest to bake my way through the dessert section of "Our Best Bites?" Well, I made leaps and bounds with that this past weekend. I made not one, but two (2!) recipes from their desserts. Don't even worry, you're getting both of them today. And in case anyone was wondering, I've re-made that chocolate chip cookie pie since screwing it up the first time (and the cinnamon roll pumpkin cake) and it's still really delicious when you make it properly! (as is the cinnamon roll pumpkin cake)

When I saw the title for these cinnamon rolls I was intrigued. I'm not a big enough fool to think that a cinnamon roll recipe exists out there that is better than my mom's. People, I have been to culinary school (cough, dropped out, cough), I have made Le Cordon Bleu's version of cinnamon rolls. Basically, I'm trying to say I've "been places" when it comes to cinnamon rolls. When I say that my mom has the best cinnamon roll recipe, it's basically the truth. At least to me. And my family. And the billions of people who expect them every year at Christmas.

But this is not about her cinnamon rolls! I've actually never made hers by myself. I'm afraid of ruining a really good thing, you know? But I've been continually on the hunt for not only delicious, but EASY cinnamon rolls I can call my own.

People, PEOPLE, I have found them.

If you are scared of yeast, throw caution to the wind and make these! They only have one (1!) rising time! And it's not a gigantic, take over your kitchen batch of rolls! Oh my gosh they're fantastic. Seriously, this is something I could see myself making on a weekly basis (if Mike has anything to say about it. I think that man would leave me for bread if bread was a person).
And, BONUS!, if you are prepped and move quickly enough, you can have hot cinnamon rolls in just over an hour. I'M NOT LYING!!!


Cinnamon Rolls
Dough
1 cup milk
4 Tbs butter, cut into chunks
3 1/4 – 3 1/2 cups all-purpose flour, divided
1 (.25 ounce) package instant or ‘rapid rise’ yeast (about 2 1/4 tsp)
1/4 cup white sugar
1/2 teaspoon salt
1 egg
Filling
1 cup brown sugar, packed
1 1/2 tablespoon ground cinnamon
1/2 cup butter, softened
Icing
1 1/2 C powdered sugar
2 T melted butter
1/2 tsp vanilla
1-2 Tbs milk
Dough: Place milk and 4 Tbs butter in a microwave safe bowl. Heat on high for 1 minute 30 seconds. Butter should be at least partially melted. Stir and set aside. In a large mixing bowl whisk together 2 C flour, yeast, white sugar, and salt. When milk mixture has cooled to warm (not hot) add it to the flour mixture along with the egg while the beater (paddle attachment for those using a stand mixer) is running. Beat until well combined, about 1 minute. (Switch to the dough hook now) Add remaining flour only until dough barely leaves the sides of the bowl. It should be very soft and slightly sticky. Continue to let the dough knead for 5 minutes. If you are not using a stand mixer, turn dough out onto floured surface and knead for 5 minutes by hand. Turn dough out onto a floured surface and let rest for about 10 minutes while you make the filling.
Filling: make sure butter is softened well. Mix with brown sugar and cinnamon.
Assembly: Roll dough into a rectangle about 12 x 14 inches. Spread brown sugar mixture (it will be slightly thick, you might have to “crumble” it) over the surface and use your fingers or the back of a spoon to gently spread around. Roll up from the longer side of the rectangle and pinch edges closed. Score the roll into 12 equal pieces and then cut into rolls. Place in a 9 x 13 pan that has been sprayed with cooking spray. Cover pan with a clean towel and let rise in a warm place for about 30 minutes. In the mean time, preheat oven to 350 degrees.
When rolls have finished rising bake for 15-20 minutes or until light golden brown. If desired spread with icing while still warm. Makes 12 rolls.

There is only one thing I would change about this, and that is the filling. I'm one who, when I'm making cinnamon rolls, likes to melt the butter, spread it on the dough, and then sprinkle it with the cinnamon/sugary goodness. If you are like me and decide to do this do not use a whole stick (1/2 cup) of butter. You could use half of a stick (1/4 cup). Also, I'm going to try it with white sugar next time. I like how the brown sugar caramelized on the bottom of the pan, but it was almost, please don't shoot me, too sweet. Mike loved everything about it, but again, he would probably leave me for bread if it was a person.


This is what the butter should like after putting in the microwave with the milk. Melted, but not completely. Also, the Best Bites gals recommend (and so do I) that you put 3/4 of the milk in to melt with the butter, and then after taking it out of the microwave, add the other 1/4. This helps the mixture cool down quicker, thus speeding up the time it takes you to get to delicious, warm cinnamon rolls!!!


Isn't bread dough just beautiful? Maybe in someone else's naturally lit kitchen?


I had ridiculous amounts of butter left, so I just drizzled it all over the filling.


Before rising...


After!!! Another hint to use with this recipe:
Heat a bowl of water in the microwave until boiling. When it's done, immediately remove it and put the pan of rolls in to rise. It will be the perfect setting for them to rise, and the pan will fit really well since it's just one 9x13.


Can you believe it's actually feasible to have these warm, out of the oven, on a regular day, without having to get up at 3 o'clock in the AM to get started???


Recipe Source: Our Best Bites